
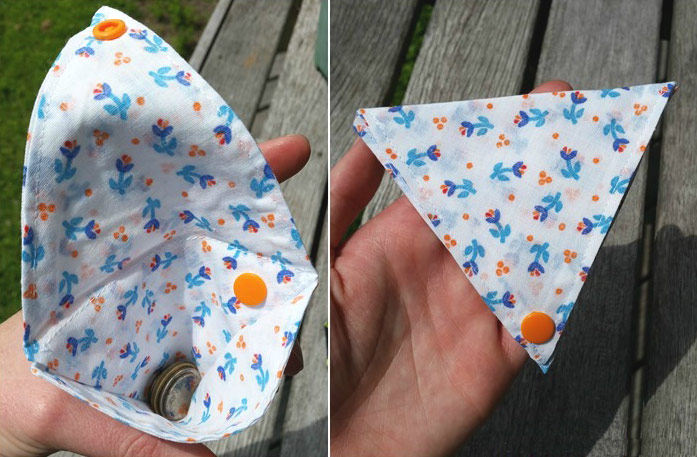
It opens the same pocket from both sides so you don’t need to work out which way is up. I was quite intrigued as a child to try and work out how it worked!
As long as your fabric is not too thin (or thick for that matter!) it should work fine. There is nothing to stop you using interfacing or layer up a few layers either.
What you’ll need,
Fabric - Scraps are fine
Domes - Any kind you like
PDF Pattern – Free to download here!
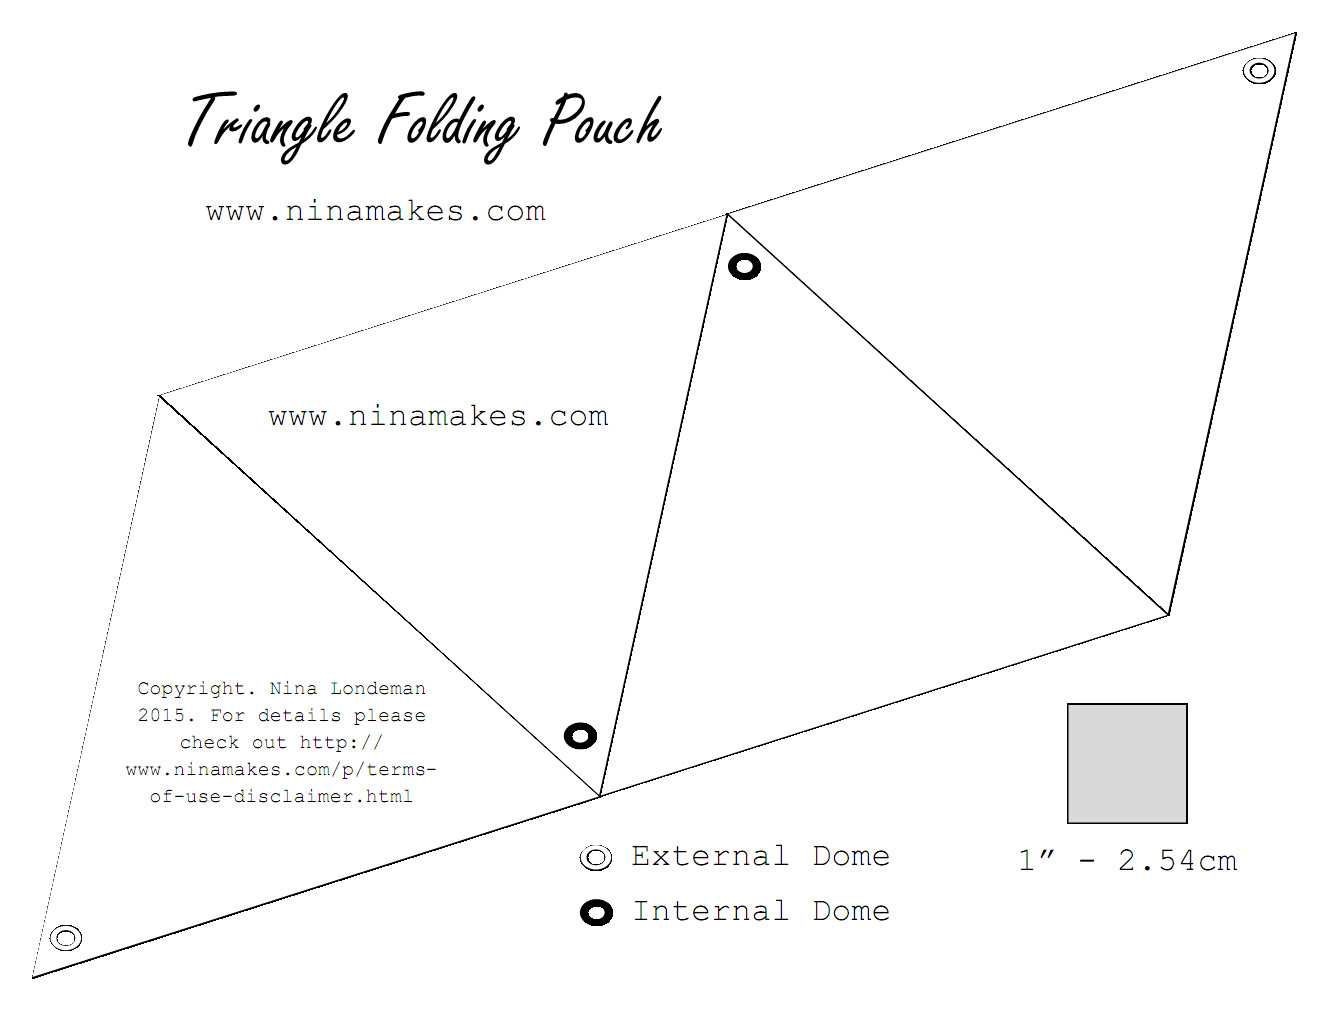
Step 1 – Print Pattern
This pattern is in A4 size but should print on any size paper as long as you use the ‘print in actual size’ option, or uncheck the ‘scale to fit’ option. Measure the 2.54cm (1”) square to be sure. The finished size is 13cm (5”) on each edge.

Using a craft knife or scissors, cut around the pattern.

Step 2 – Cut Fabric
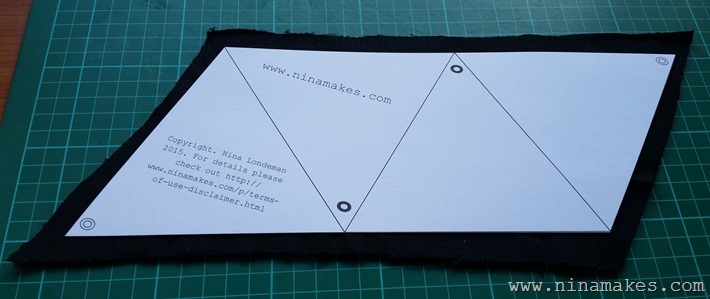
There are two ways to do this, with a fold on one long side or two separate pieces of fabric. For this tutorial I will show you the folded option, but I’ll add a few photos and explain the separate pieces option too.

Fold your fabric right sides facing (I know mine is right side facing out but my daughter liked the wrong side better!) and lay one long edge on the fold, then trim around the pattern leaving a 1cm (3/8”) edge around the outside. This doesn’t need to be accurate so just eyeball it!
For the separate pieces you need to leave the 1cm (3/8”) edge all round the pattern.
Step 3 – Mark the edge of the pattern
Using fabric markers (I use dressmakers pencils) draw your pattern onto your fabric.

I used a ruler and drew just around the edges of my pattern piece.

You can see the blue lines on the folded version above.

On one short side mark 2.54cm (1”) in from the ends. This is the opening to turn it right side out. The pencils are pointing to the marks, they are a little hard to see!
Step 4 – Sew Outside Edge
Time to sew along your drawn line.

Remember to leave the gap between your marks open, so you will need to sew the small piece separately. For the separate piece option you can just sew from one side of the opening right round to the other side.
Step 5 – Turn Around
We just need to trim the corners to get a nice fold in the corners.

Time to turn it right side out!

I like to use my dressmakers pencil (with the lid on!!!) to push out the corners from the inside.

All that’s left is to press it flat with your iron. Fold the opening in to match the rest of the side.


Step 6 – Topstitch
You all need to topstitch the right round the edge, this will also close the hole used to turn it around. Fairly close to the edge is best.
The diagonal seams are optional. You only really need to do these if your fabric is thin. This helps stiffen the fold and stops it sagging allowing you coins to fall out! If you have fairly thick or stiff fabric then you can skip this step.

Mark the points or the triangles on the long sides (one on each side). Then draw the lines on using a ruler.

A little hard to see! But the blue lines are there, now you just need to stitch over them. I do this in one go starting from the top left (in the photo) and follow the zigzag to the bottom right.

Step 7 – Folding it up
It is really very simple to fold up. With the inside facing up fold on the line the pencil is laying on. I pressed mine first to make it easier to show you!


Now head to your iron and press in the creases.
Step 8 – The Domes
The last step is to attach the domes.

My dome set came with a pointed tool to make the holes for the domes. I use this to make the first hole in the centre near the end of the point.

Then I mark the place the point lands on the layer underneath.

Place the first dome on the outside.

Then the matching internal one. You will need to fold open your pouch to do this one.

Repeat on the other side and folded out it will look like this.

Enjoy your new pouch! I hope you like them as much I do!


0 comment:
Post a Comment