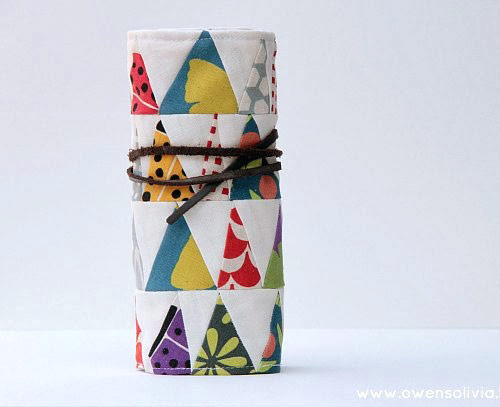

This roll features 16 cute little pockets to hold markers, crayons, paintbrushes, pens, pencils, and anything else your creative mind likes. Featuring a simple leather strap, it’s ideal for little ones who find velcro, tying, or buttons difficult to use, yet it is also perfect for the more mature crowd. I can imagine this making a cute make-up roll to hold all those eyeliners, lipsticks, mascara, and brushes as well.

Materials Needed:
Outer fabric – I used the Wonky Triangles pattern to create my fabric strip. It measures 7.5″ x 24.75″ but make sure you measure whatever items you would like to roll up because you may need it to make it longer or wider. This size is sufficient to hold crayons as well.
Inside fabric- Cut to the same measurements as outer fabric.
Lining- Cut to same measurements as outer fabric. You can use felt, batting, or canvas.
Pouch – 5″ x 24.75″
Leather cord – 23″
Step 1
Using your pouch fabric, fold over 1/2″ at the top and press with a hot iron. Fold over again, press, and topstitch into place.

Step 2
Lay out your lining. Place on top your inside fabric right side up. Place pouch fabric right side on top squaring up the bottoms and sides. Pin into place. Starting on the very end, measure and mark 1.75″ and after that, mark every 1.5″.

Stitch along your marking lines, reinforcing near the top for extra strength. These pockets can hold two paintbrushes or crayons, so feel free to adjust the width if needed.

Place your leather cord on top of your inside fabric somewhere in the middle with the cord laying across it. Using your zigzag stitch, stitch your cord into place in the seam allowance. Do not stitch past 1/4″. (I used a stabilizer for extra help while sewing.)

Step 4
Now it’s time to sew all three layers together. Place your inside fabric right side up, and place your outer fabric right side down. Stitch a 1/4″ on all four sides leaving about a 4″ hole opening. Trim corners if needed. Pull out fabric through the hole. To finish your artist’s roll, push your corners out, and press seams flat. Topstitch on all four sides making sure to stitch the hole shut. You are done!


Thanks so much for all your wonderful ideas and for sharing them, really love your creations.x
ReplyDeleteMade a lovely artists roll following your instructions which were easy to follow. Thank you
ReplyDelete