
This one came about specifically with a trip to Disneyland in mind. You’ve got to take your phone and wallet with you, but there are all those rides where you get splashed, so here’s my solution: a small pouch you can sling over your shoulder, it fits your phone and a card wallet, plus chapstick and lip gloss.
And the best part? It’s lined with vinyl to protect your stuff from splashing water. Now, it’s not water-proof. Don’t go dropping it in a pond and then get mad at me when your phone is ruined. But it will keep it safe from Splash Mountain.
Here’s what you need:
Exterior fabric
Lining Fabric
Vinyl
Woven Interfacing (like Shape Flex by Pellon)
From each of the fabrics above cut (2) 7.5″ x 9″ pieces. Sub-cut one of each fabric into 1.5″ x 9″ and 6″ x 9″ pieces (exterior fabric below is shown sub-cut).
You’ll also need 50″ of cording for the strap and one 9″ or longer zipper.

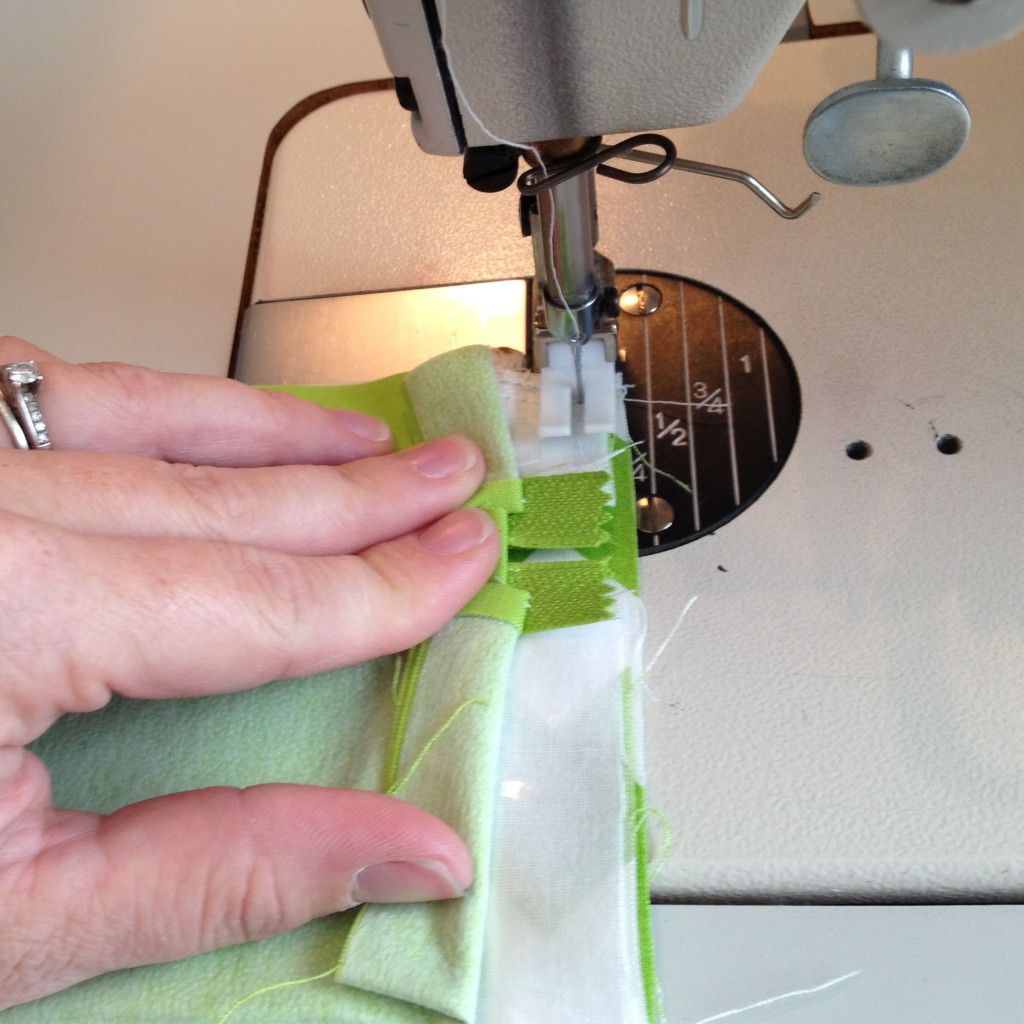
Fuse interfacing to the exterior fabric according to the manufacturer’s directions. Baste the vinyl to the corresponding exterior fabric pieces by sewing with a large stitch length about 1/8″ from one edge. I’ve seen fusible vinyl, but I’ve never tried it. I’ve just had a roll with a few yards hanging around for a long time that I use. It’s a lot less expensive than the fusible, and it works for me.

Vinyl is sticky to sew with. Depending on your presser foot, you could find it doesn’t like to move at all. I’m using a Teflon foot for my machine. Most machines should have one available if you’re planning on using vinyl a lot, or laminated cotton. Before I had this foot I used painter’s tape on the bottom of my regular presser foot. Just put a piece of tape on the bottom and cut around the shape with an exacto knife.
Now you’re going to make your zipper sandwich, just like in the pouch with zipper tabs. Layer the 1.5″ exterior piece right side up, zipper right side down, and the 1.5″ lining piece right side down on top of the zipper. Lining up the edges, sew together with a 1/4″ seam allowance, starting and stopping 1/2″ from each end. Backstitch at the beginning and end.

This will put your basting stitches within the seam allowance. Press the pieces away from the the zipper teeth and topstitch 1/8″ from the edge, again starting and stopping 1/2″ from the ends. Be careful when you’re pressing these pieces. Use a low temperature and don’t keep the iron in place too long or you’ll melt the vinyl.
Repeat with the 6″ x 9″ pieces on the other side of the zipper.
Next you’re going to attach the cording to the top of the pouch. Making sure you fold the lining out of the way, line up the cording 1/2″ in from the sides on the top edge. Stitch in place, going back and forth 3-4 times to secure it in place.

Open the zipper at least half way and bunch the strap up in the middle of your pouch to get ready to sew the next pieces on.

Holding the lining out of the way, pin the 7.5″ x 9″ exterior piece to the exterior piece attached to the zipper.

Sew all the way around the outside of the exterior pieces using a 3/8″ seam allowance. When you get to the sides near the zipper, just fold the lining back out of the way and sew the sides of the zipper to the exterior fabric.
Repeat for the lining. Hold the exterior out of the way to pin the lining pieces together. This time when you sew around the exterior leave a gap of about 4″ in the bottom to turn your bag through. And when you get to the sides with the zipper ends, fold the zipper up with the exterior you’ve sewn it to so you’re only sewing the lining to itself.

Trim each of the corners, being careful not to cut your stitching. Trim the seam allowance down, especially the vinyl, and trim the end of your zipper even with the fabric edge.

Now you’re ready to turn the whole thing inside out through the opening in the lining. Make sure to press the corners out really well to get a nice looking finished product. To make sure the lining stays in place along the top, open your zipper all the way and match up the top seams on the lining and exterior fabrics. Stitch in the ditch along the seam to keep them together.

Sew the opening in your lining closed and you’re finished! And please remember… this is water-resistant, not waterproof. If you don’t care about splashing, just leave the vinyl out.


0 comment:
Post a Comment