
I’m going to show you how to make this fun little lunch tote!

Let’s get started!
1. Supplies: You’ll need 1/2 yard each of two vinyls (one exterior and one liner). You will also need a 1/2 yard of Insul-fleece, 10″ of velcro and a 1 1/2″ x 14″ piece of Annie’s Soft & Stable. You will have enough vinyl leftover to make another lunch bag!

I suggest Mettler 50 wt thread. It is a great thread for construction. I also used it for the topstitching. I used a Quilting Needle size 75/11. I tried a few different types of needles and this worked the best. It is designed to go through batting and fabric at once. We are using Insul-fleece, so that does makes sense!

Other supplies needed in addition to traditional sewing supplies: Wavy or Pinking Rotary Blade & Clover Wonderclips
2. Cutting: Cut two 13″ x 14″ pieces from the exterior vinyl print.

Cut two 13″ x 15″ pieces from the lining. Also cut one 3″ x 14″ piece for the handle.

Cut a 1 1/2″ x 14″ piece of Soft & Stable for the handle. You want to cut it just a little scant from the 1 1/2″ mark as pictured.

Cut two 13″ x 14″ pieces of Insul-fleece. Insul-fleece is great; it keeps things warm or cold.

3. Making the Handle: Lay the strip of Soft & Stable in the middle of the vinyl handle piece.

Fold the vinyl in half around the stabilizer.

Use Clover Wonderclips (or clothes pins) to hold in place.

Topstitch down the side 1/4″ from the edge. Use dual feed or a walking foot if available.
SIDENOTE: If you are having difficulty sewing on the vinyl, you can lay a piece of tissue between the vinyl and your machine. This will prevent the vinyl from sticking. You can also use a teflon presser foot if available.

You should have this.

Fold the vinyl over the other edge of the stabilizer.

Fold under the excess from the other piece of vinyl.

It should look like this.

Use Clover Wonderclips to hold in place.

Topstitch 1/4″ seam on the other edge.

4. Sewing the Exterior: Make a sandwich with the two pieces of Insul-fleece as the bread and the two exterior pieces of vinyl right sides facing in the middle.

Place the handle 2″ from the top edge. Note that the handle is 14″ long, but the lunchbag is 13″ wide; there will be excess handle. You want to align the edges. Then lunchbag is 14″ tall, so if you don’t have excess handle, you have it oriented the wrong way.

Use Clover Wonderclips to hold the sandwich together. You don’t want to use pins on the vinyl as it will leave a hole.

Using a 1/2″ seam, sew the three sides of the bag.
SIDENOTE: You’ll want to sew top to bottom on one side and then top to bottom on the other side. Lastly, sew across the bottom edge. Sewing in the same direction will ensure that your bag stays more aligned and pushes the excess fabric in the same direction. If you sew one continuous seam around all three sides, you are more likely to have the edges move.

Box the corners. Fold the bottom seam so that it aligns with the side seam. If you have the seam allowances going in opposite directions, they will lock together.

Mark a line 2 3/8″ from the corner.

Sew across the line. Backstitch at the beginning and end.

Repeat for the other corner. This is what you should have.

Turn it right side out. Your corners should look like this.

5. Sewing the Lining: Lay the two pieces of lining vinyl right sides together.

Sew the three sides. You are sewing both 15″ sides and one 13″ side.

Use a 1/2″ seam allowance.

Box the corners in the same manner that you did for the exterior.
SIDENOTE: I do not trim the corners once boxed. I leave the fabric to add stability; this is personal preference.

Using a pinking or wavy rotary blade, cut a decorative edge across the top of the lining. If you don’t have one of these blades, pinking shears will do the trick!

6. Finishing the Lunch Tote: Place the lining inside of the exterior wrong sides together. Place the seam allowances so that one goes one direction and the other goes the opposite direction.

Fold the lining 1″ over the edge. Use Clover Wonderclips generously to hold the pieces together.

Topstitch around the edge. I used a teflon presser foot here which was great!

This is what you should have!

Attach a 10″ piece of velcro to the top edge of the bag on the same side that the handle is on. You should center it on the bag; it will be about 1″ from each edge. I put the soft piece here. Stitch a box 1/8″ from the edges of the velcro.

This is what you should have now!

Attach the other piece of velco to the other side of the bag. Place it so that the bottom of the handle and the bottom of the velcro align. It will also be 1″ from each side.

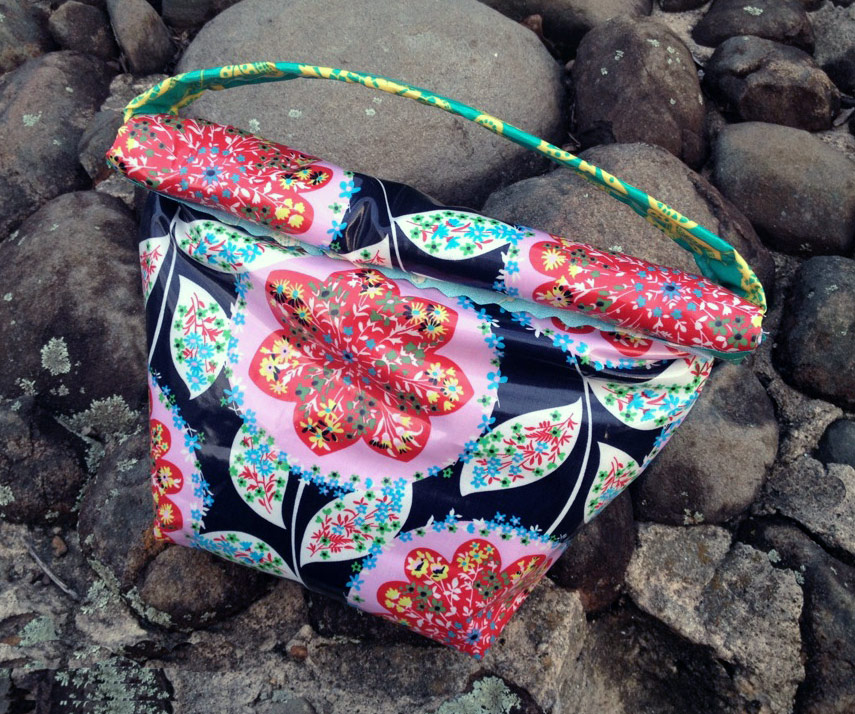
You’re done!! Admire your work and pack your child a yummy lunch!


0 comment:
Post a Comment