
You will need:
Fabric for bag (I’ve used Blue and Green Floral)
Ribbon or string (for drawstring)
Matching thread
Pins and scissors
Ruler and pencil/Tailor’s Chalk
Sewing machine and iron
Safety Pin

1. Cut your fabric.
The size of your fabric needs to be double the width of your bag (as we are going to fold it over to create the front and back). The size of your bag is entirely up to you and what you want to use it for. The size of my fabric in this tutorial is 10″ high x 14″ wide, to make a bag approximately 10″ high x 7″ wide.
2. Hem the top edge of the fabric.
With the fabric placed wrong-side up, lying landscape, mark a small 1cm mark down from the top corners.

Fold the fabric over (so right-side towards the wrong side) and press.

Sew a line of straight stitches across this fold to stitch in place.

3. Sew the bag together.
Fold the fabric in half length-ways, right-sides to right-sides. Pin in place.

Starting from the bottom, using a 1cm seam allowance, sew a line of straight stitches across the bottom and up the open (non-folded) side stopping a few cm before the top (because of the size of my bag, I stopped 5cm before the top of my bag). Stay-stitch at the start and end of your line of stitches.


Press open the seams, especially the opening at the top of the bag.


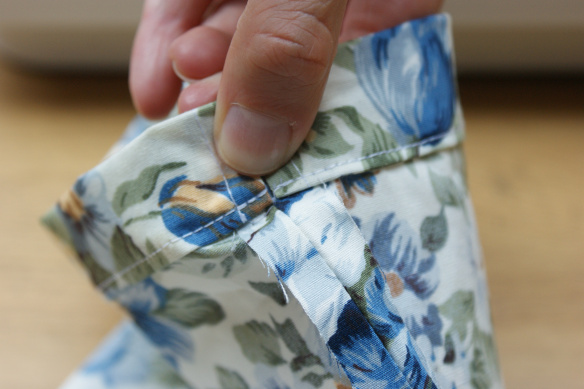
4. Sew open the seams.
You are going to sew the seams around the opening at the top of the back to hold them in place.
Start from the top of one side, sew a line of straight stitches down to the bottom of the opening, sew across to the other side and back up to the top.


5. Create the drawstring channel.
Fold the hemmed edge of the top of the bag over (again right-side towards the wrong-side) approximately 0.5cm so the raw edges are hidden, press to hold in place.


Fold the top of the bag over again so the edge you have just folded lines up with the bottom of the opening. Press and pin around the bag to hold in place.


Sew as close as you can to the edge of the fold all around the bag to secure the drawstring channel.

Tip: Keep maneuver the bag as you go to make sure you don’t sew one side of the bag to the other.
Turn the bag the right way out and press.
6. Add the drawstring.
Thread a safety pin through one end of the string or ribbon you are using for your drawstring.
Feed the safety pin into one end of the bag’s drawstring channel and gently feed through the channel until it comes out of the other side.

Tie in a pretty bow and the bag is ready!


0 comment:
Post a Comment