
Zipper clutches are always a favorite sewing project, they can be used for so many things! The perfect date night clutch, a lovely handmade gift, a travel jewelry holder, make up case – you name it! Add scalloped leather to the bottom, in GOLD, and you now have zipper clutch perfection.

I think clutches are just so much fun for special occasions and when I came across this gold leather from LR Stitched, I knew it would make for the perfect date night clutch.
Want to make a leather scallop zipper clutch too? Let’s get started!
Materials
Main Fabric – Two 11 ¾ inches wide x 7 ¼ inches tall
Fusible Fleece – Two 11 ¾ inches wide x 7 ¼ inches tall
Lining Fabric – Two 11 ¾ inches wide x 7 ¼ inches tall
Pocket Fabric – Two 9 inches wide x 4 ¼ inches tall
Leather – 11 ¾ inches wide x 3 inch tall
Zipper Tab Fabric – Two 2 inches wide x 3 inches tall
9 Inch Zipper (Mine is a fashion zipper from Joann’s)
Elmer’s Multi Purpose Glue
Standard Needle
Leather Needle
General Sewing Supplies
Instructions
One: Cut out the main fabric, fusible fleece, lining fabric, zipper tab fabric, and pocket fabric to the dimensions in the materials list and press.
Two: Attach the fusible fleece to the main fabric pieces by ironing the fusible fleece on the wrong side of the main fabric.
Three: Trace your scallops on the wrong side of a piece of leather and the cut out the leather so it is 11 ¾ inch wide by 3 inches tall. Repeat for the second piece of leather.

Four: Apply the Elmer’s multi purpose glue to the wrong side of the leather, avoiding the edges, and place the leather on the bottom of one of the main fabric pieces, gluing the leather to the fabric. Repeat for the second main fabric piece. Set these pieces aside to dry.

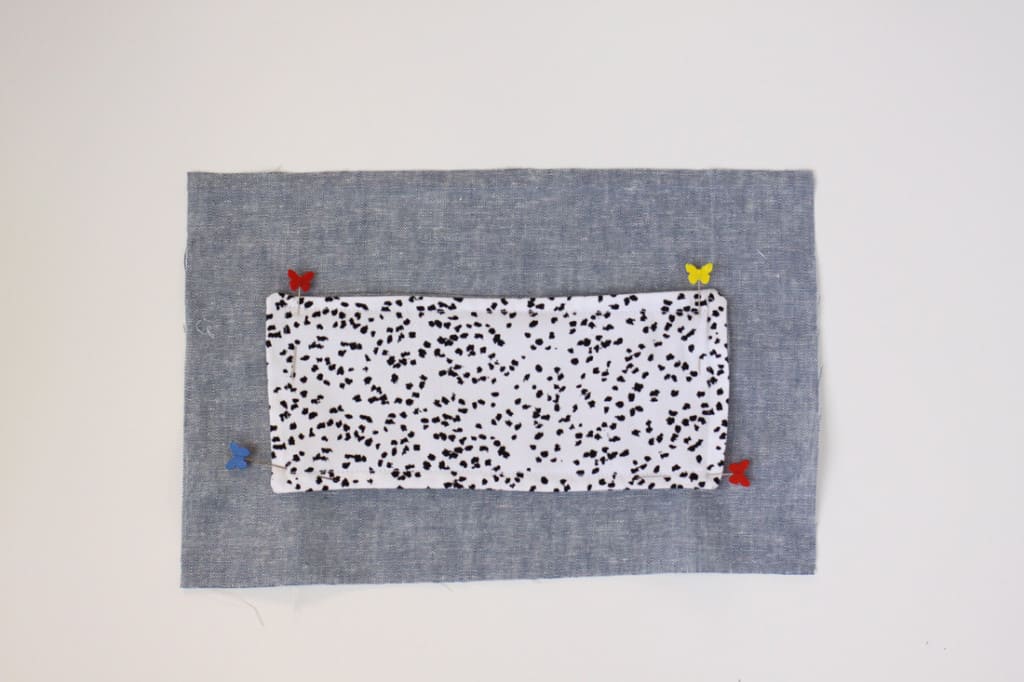
Five: Sew the two pocket fabric pieces (I used one piece of the linen and one piece of the spotted fabric) right sides together with a 5/8 seam allowance, leaving a two inch hole, backstitching at the beginning and end. Turn the fabric through the hole, tuck the excess fabric from the two inch hole in, and then press. Using a ¼ seam allowance, top stitch near the edge of the fabric all the way around, closing the hole, backstitching at the beginning and end.

Six: Place the pocket fabric on top of one of the lining fabric pieces, right sides up. Top stitch the sides and bottom of the pocket fabric to the lining fabric with a 1/4 inch seam allowance, backstitching at the beginning and end. Make sure to leave the top open as this will be the pocket.
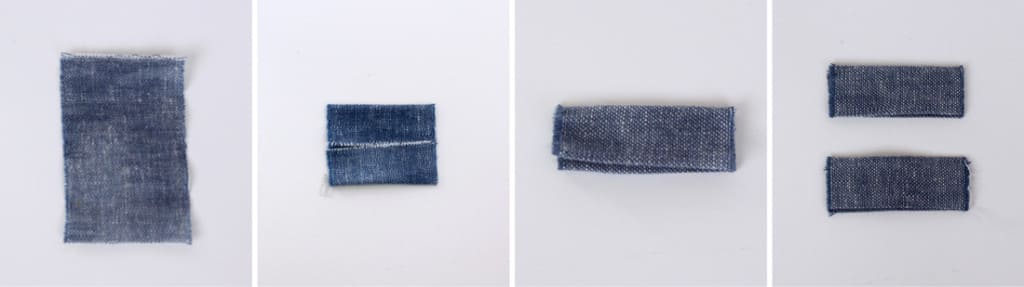
Seven: Take the zipper tab fabric and fold the short sides towards each other, meeting in the middle. Then, fold it in half again. Press. Repeat for the second zipper tab.
Eight: Open the zipper half way and baste stitch the open ends.

Nine: Place one zipper tab on the end of the zipper and sew close to the edge of the tab. Repeat for the other side of the zipper.

Ten: The main fabric pieces should be dry by now. Using a leather needle and a longer stitch length, top stitch across the top of the leather just below the scallops. Repeat for the other main fabric piece.

Eleven: With the main fabric piece right side up, place the zipper upside down with the zipper pull on the left, in the top middle of the fabric. Make sure the top of the zipper is aligned with the top of the main fabric piece. Pin and then baste stitch.

Twelve: Pin the lining on top of the main fabric with the zipper attached, right sides together. Using a zipper foot, stitch along the top of the zipper, just below the baste line.
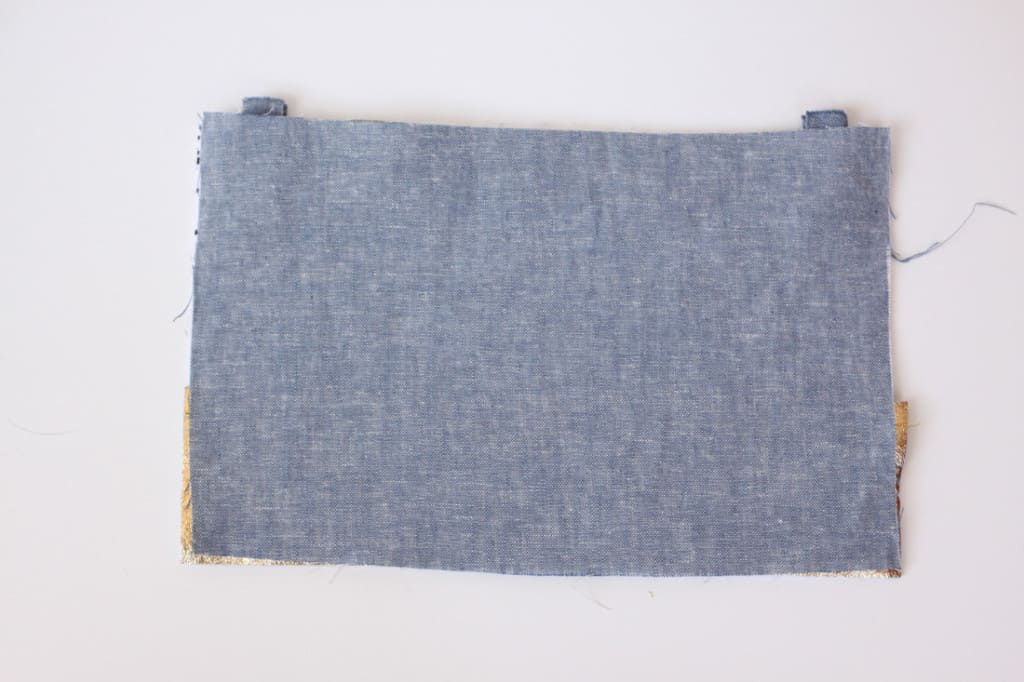
Thirteen: Pull the main fabric and the lining together at one side and press. Make sure to avoid touching the hot iron to the leather.

Fourteen: With the second main fabric piece right side up, place the sewn zipper piece on top, right sides together, aligning the top of the zipper with the top of the second main fabric piece. Pin and then baste stitch.


Fifteen: Pin the lining on top of the main fabric piece, right sides together. Using a zipper foot, stitch along the top of the zipper, just below the baste line.

Sixteen: Pull the main fabric and the lining together at the side and press.
Seventeen: Top stitch the main fabric to the lining fabric on each side near the zipper.

Eighteen: Open the zipper almost all the way. Pull the main fabric pieces together at one side and the lining fabric pieces together at the other side. Pin or clip around, making sure the leather pieces are lined up.

Nineteen: Using a 5/8 inch seam allowance, stitch completely around, leaving a 4 inch opening in the lining. Backstitch at the beginning and end.

Twenty: Turn the bag right side out through the opening.
Twenty One: Machine or hand stitch the opening closed and tuck the lining into the bag. Press.


Thanks so much for stopping by, and until next time…
Happy Sewing!


0 comment:
Post a Comment