
This zip pouch is made with scraps sewn together to form panels, then some quilting lines are added to create a nice sturdy pouch. This pouch measures 10.5″ long and 7″ tall when finished. You can make different sizes, just cut your strips a bit shorter and don’t add as many to the panel.

It’s very quick and easy – here’s how you do it.
Materials:
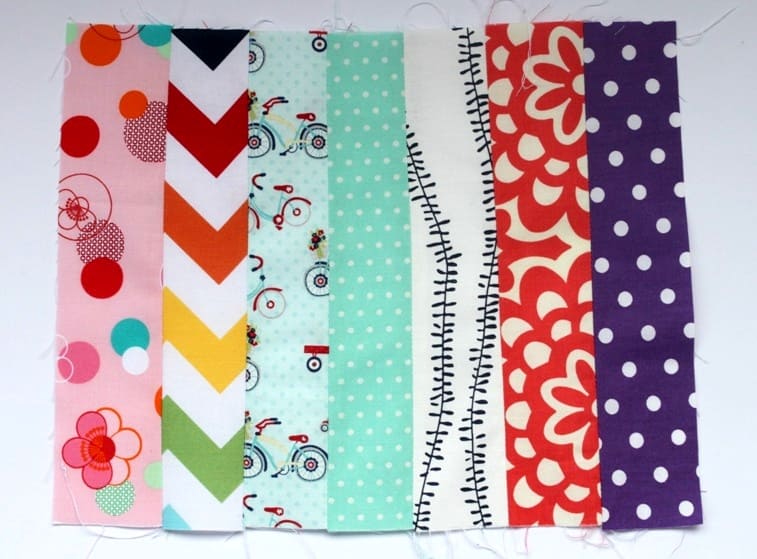
fabric scraps – 14 strips cut 2″ wide and 9″ long.
some quilt batting scraps
fabric for lining (no more that a fat quarter)
a 12″ zipper
rotary cutter and mat

1. Cut and press your fabric strips. Line them up next to each other and choose which ones you want to sew together for each panel. There is 7 strips per panel.
2. Sew the strips together along the long edges using a 1/4″ seam allowance. Press seams open.
3. Use your panels as a guide and cut two pieces of batting and two pieces of lining to the same size.
4. Place your panel on top of a piece of batting and stitch either side of the seams in the panel. I used the width of my presser foot as my guide. Start from the middle seams and work your way out.
5. Trim up your panels. Trim lining pieces if required so that the panels and lining are the same size. Your quilted panels will look like this:

6. Time to sew in the zip. Attach a zipper foot to your sewing machine.
7. Place a quilted panel right side up, then place the zip face down on top of it.

8. Place the lining right sides down over the top. Stitch along the top edge to secure the panel, zip and lining together.

9. Repeat for second panel and lining. Open out and lightly press.

11. Stitch down each side of the zipper (as indicated by the dotted lines in the picture below). This secures the panel and lining pieces together and ensures the lining doesn’t poke out and get caught in the zipper teeth.

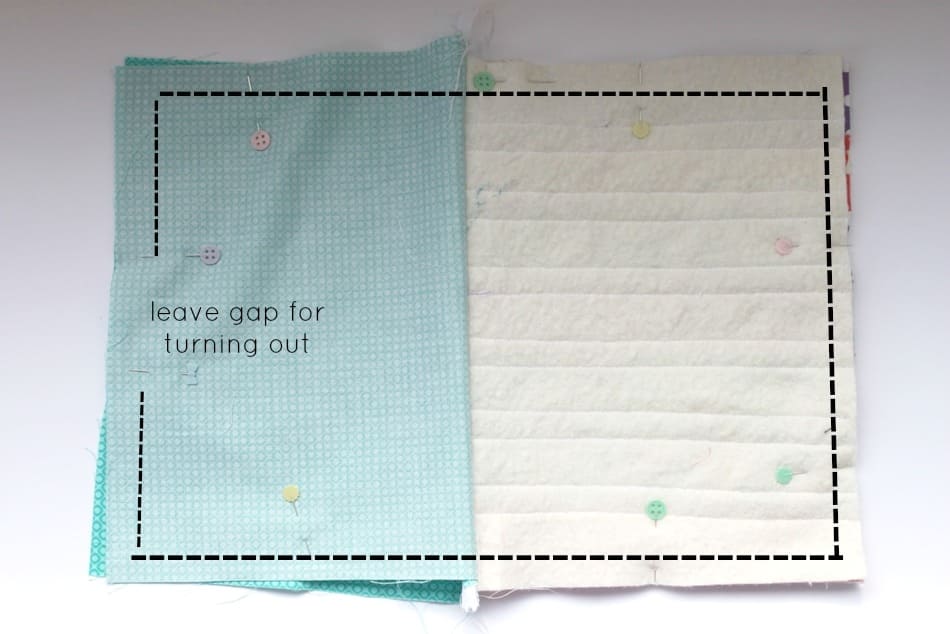
12. Open the zipper halfway. This is essential – don’t forget this part! Otherwise you won’t be able to turn your zip pouch out once you’ve stitched the sides.
13. Place the panels right sides together and the lining right sides together. Pin and stitch all the way around (as shown by the dotted lines in the picture below), leaving a gap in the lining for turning. Make sure the zipper is folded so the teeth face into the lining. If you are not sure what I mean, give this post a quick read.
15. Box the corners. If you want your pouch to have a flat bottom and stand up like the one in the picture, you will need to box the corners. If you are happy to have a flat pouch that you can slip into your handbag, you can skip this step.
Fold corners to form a triangle so that seams are aligned down the centre of the triangle. Measure 1.5″ or 4 cm in from the point of the triangle. Mark with a fabric pen. Stitch across the triangle. Cut off corner.

16. Repeat for remaining 3 corners.
17. Turn your pouch through the gap in the lining. Stitch lining gap closed. Give your pouch a very gentle press if it’s a bit wrinkly.
That’s it – you are finished! Add a scrap of ribbon as a zip pull if you like.


0 comment:
Post a Comment