
This block has been called many things over the years, dating as far back as 1907, from a Friendship block to a Hearth and Home block, but I think Star Crossed might be a better name for it, so that's what I'm calling it.
For a 10 1/2" block, you'll need:
2 contrasting printed fabrics
1 background fabric
Cutting Instructions
focus fabric:
two 2 1/2" squares
one 2 1/2" x 6 1/2" rectangle
contrast print:
eight 2 1/2" squares
two 4 1/4" squares
background:
four 2 1/2" squares
two 4 1/4" squares
note: all seams are a scant 1/4" unless otherwise noted
Block Assembly
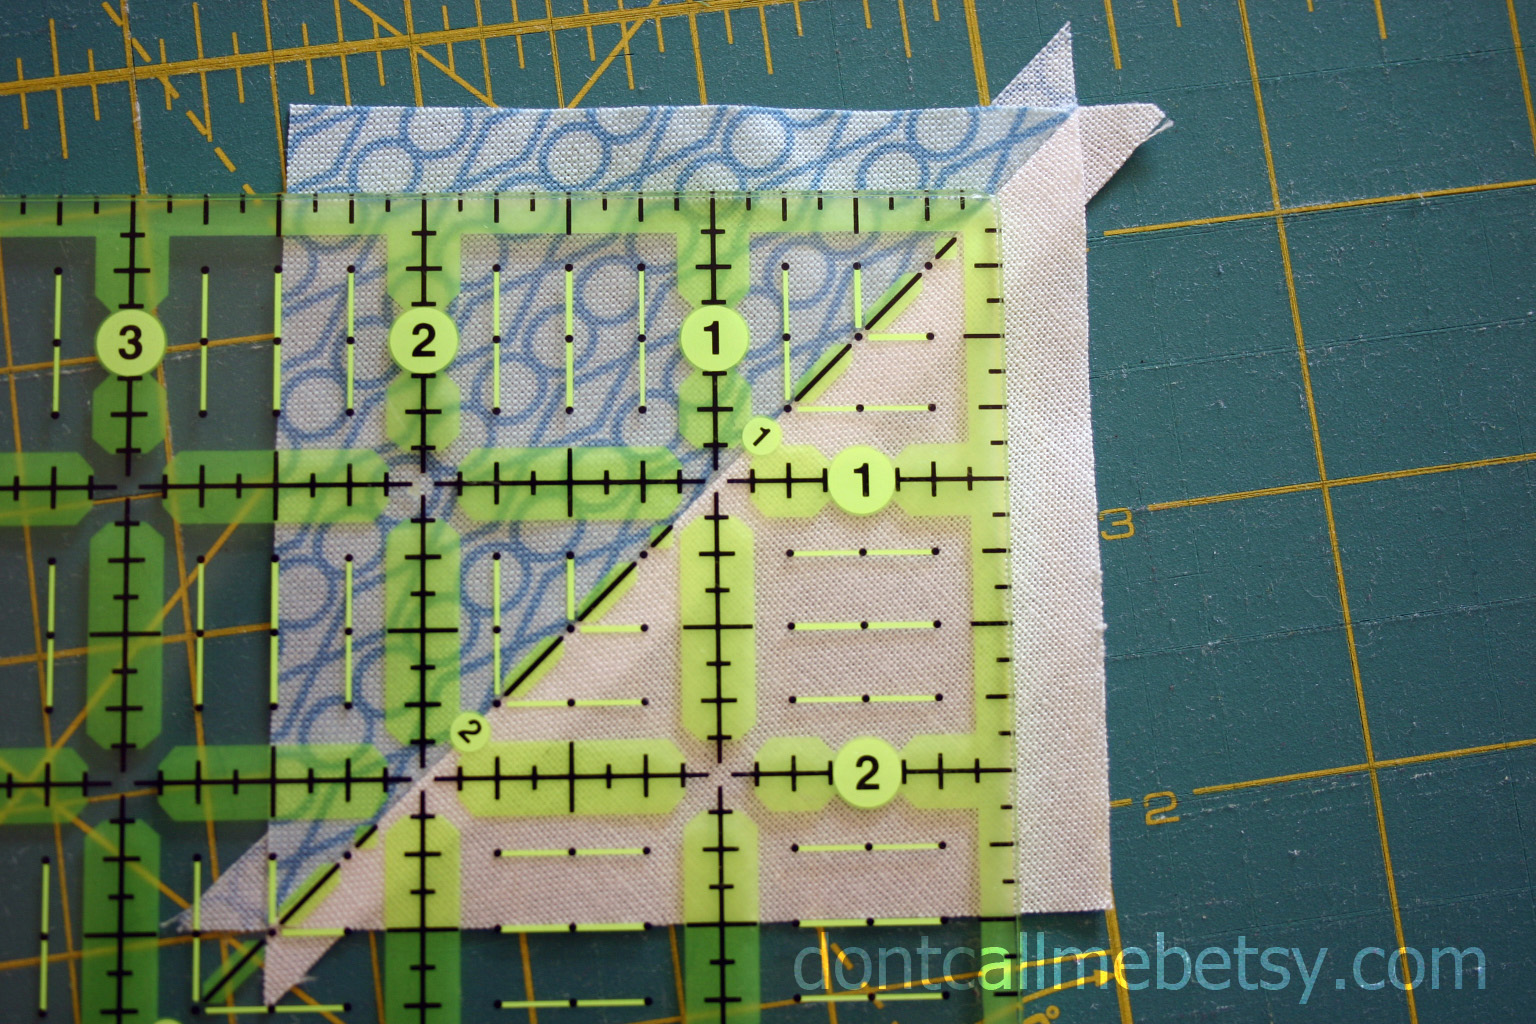
1. First, let's make some HSTs. Pair up one background 4 1/4" square with a contrast print square, and sew all the way around. Bring your newly sewn pair of squares over to your cutting mat and make two diagonal cuts as shown below, cutting from corner to corner.

2. Press seams open for your new HSTs and bring them back to the cutting mat. Using a ruler with a 45 degree angle marking, line up your HST along the center seam and trim to 2 1/2".
3. Lay out your HSTs along with the various 2 1/2" squares as shown below.

4. Sewing in pairs, stitch the squares of each row together, then sew each row together to finish the block. Press seams open and voila, a finished block!


0 comment:
Post a Comment