
Today I will be sharing a tutorial for an English Paper Pieced tote! This tote finishes at approximately 13.5"H x 11"W x 4"D.
Here's what you will need to get started:
76 - 5" charm squares
72 - 2" paper hexagon templates
4 - 1 1/2" paper hexagon templates
1 - 22" x 47" piece of batting
1 - 22" x 47" piece of cotton duck canvas
2 - 16.5" x 15.75" pieces of fabric for lining
2 yards of cotton webbing
You also might want to consider a snap closure.
1. Start by piecing your hexagons! You will need 6 strips with 12 finished hexagons. If you are unsure of how to EPP you can find my tutorial here. Keep in mind, if you decide to use directional fabrics you will want to think ahead for that.
If you look at the picture below, I have chosen to intentionally position my directional fabrics. The line down the center marks where the bottom of the bag will eventually be. As you can see I have pieced 6 strips with 12 hexagons. For those of you who are new EPP. Now is when you would press your panel and remove your paper pieces.

2. Next, you will need to baste the cotton duck, batting, and hexagon panel.

3. Quilt as desired!

4. Trim the panel to 17" x 39".

5. Fold both the short ends down 1.75" and press.

6. From the 2 yards of cotton webbing, cut two straps that measure 33", and attach one strap to each end of the panel. The outside edge of the strap is 3.5" in from side. The bottom of the strap is 3.5" down from the top folded edge of the panel.

7. Paper Piece four of the 1.5" hexagons. We will use those to cover the ends of the straps. Once they are basted, press all four hexagons and remove the paper. Place one hexagon over the end of one of the straps and top stitch around the entire hexagon. Proceed with the other three remaining hexagons.

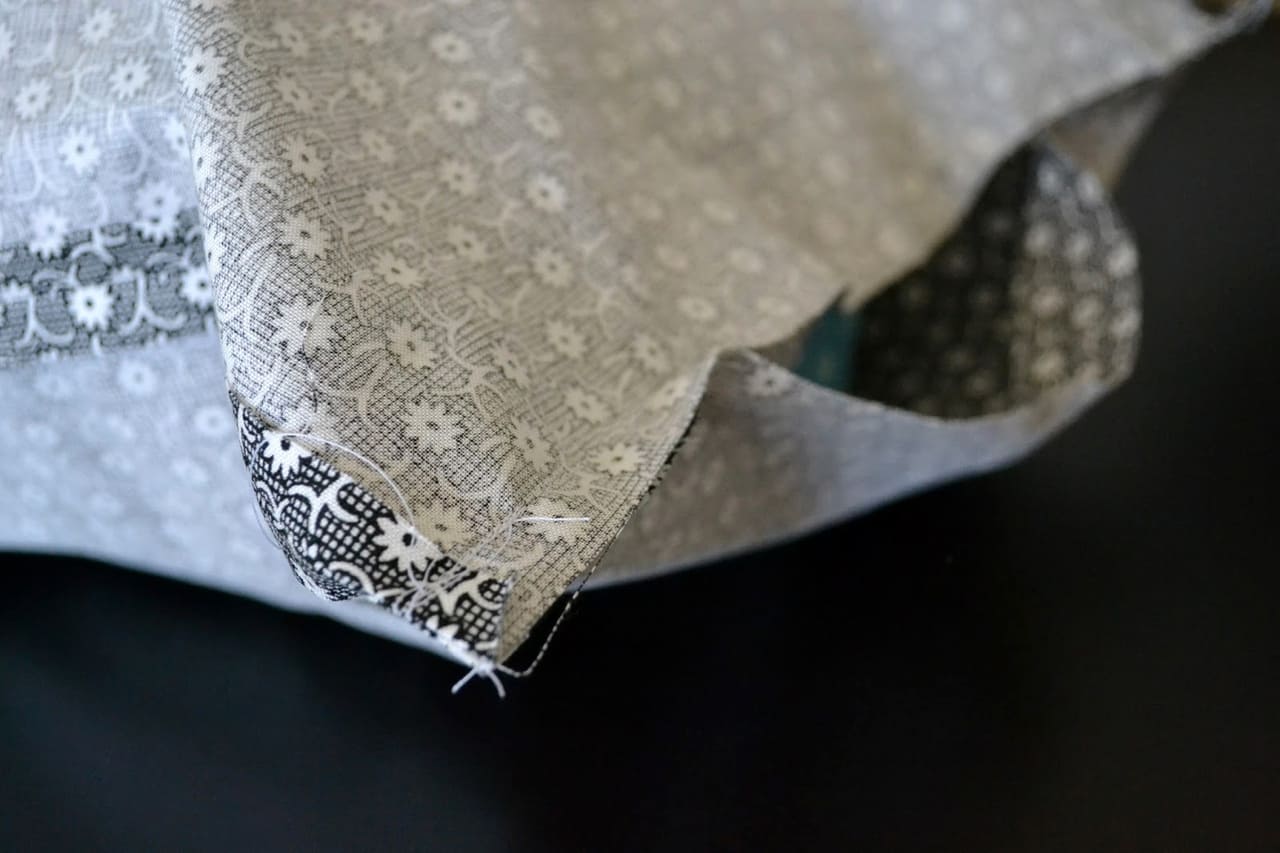
8. Once the ends of the straps are covered by the 1.5" hexagons we will start assembling the bag. First, flatten the panel, unfolding the 1.75" fold on both the short ends. We need a flat surface to work with. Then, fold the panel in half, matching up the short ends. Next, sew down the two long ends using a 1/2" seam.

9. Next, it's time to box the corners. Pinch the bottom edge toward the side seam.

10. Flatten and measure 3" in and mark a line.


11. Sew on that line.

12. Cut off the excess leave a 1/2" seam. Repeat steps for the other corner.

13. Both of your corners should now be boxed! Make sure to press those seams open!

14. Turn the bag right side out.

15. It's time to work on the lining! Lay your two pieces of lining fabrics right sides together.

16. Sew a 1/2" seam down each 16.75" side.

17. Press both seams open.

18. Slip the lining around the assembled tote that you have from step #14. Right sides of the fabric should be together. Line up the seams of the lining with the seams of the assembled tote. You will want to pin or wonder clip the lining in place. Make sure that the handles are not in the way!!!

You can see here that my seams are lined up!

19. Stitch a 1/2" seam all the way around the top of the bag.

20. To partially close up the bottom you will need to push the bottom of the bag up and out of the way. You need to sew a 1/2" seam 4 inches in from each corner.
21. Next, you will need to box the corners like you did with the tote in steps #9-12. Remember to measure in 3" and mark your line. Sew on that line.

22. Cut off the extra fabric leaving a 1/2" seam. Do the same with the other corner.

23. With the opening that is left at the bottom, you will want to pull your tote through!

Keep pulling!

24. Once you have pulled the tote through, you will be left with this. I added a snap closure to my bag. If you were wanting to do that, now would be the time while the lining is still open. There will be instructions for installation with whatever hardware you purchase. A snap is not necessary though!

25. We need to close up the bottom of the lining. With your machine, or if you want to be an over-achiever, you can hand-stitch the opening closed.

I usually close my linings with my machine. I'm the one using the bag and no one will see the inside.

26. Stuff the lining into the bag and turn down the outer panel 1.75". There still should be a crease where we previously ironed it.

27. All we have left is to top-stitch around the top of the bag. I top-stitched about 1/2" from the top of the bag.

Now you have a very sturdy bag to tote all of your favorite things around!


0 comment:
Post a Comment