
I wanted to do a tutorial for a simple little pouch. Something no-fuss that could be made in a few short hours. I don't know about you, but I have a TON of friends, family, and coworkers that I have to make birthday and Christmas presents for, so as much as I love show-stopping gifts and elaborate bags & pouches, sometimes it's nice to have a small, quick gift in your repertoire :)
finished pouch measures about 4" x 3" x 2.5"

MATERIALS
You will need the following for both your Exterior & Lining:
(2) 5" x 6" pieces
(1) 3" circle
Rounded Metal Frame measuring 2" tall x 3" at it's widest point (base)
NOTE: I didn't need interfacing for the Exterior because I used a heavier weight linen-cotton blend material. If you use a lighter material (like regular quilting weight cotton), you will need to interface the exterior fabric. Pellon 931TD is my go-to interfacing for bags and pouches.
INSTRUCTIONS
Find all your Exterior pieces

Grab the first 5" x 6" piece and fold in half along the width, and finger press the seam. Open back up, and mark a line 1/2" from the center on either side. Then make a second mark 1/2" to the side of the 1st mark (on each side).

Pinch and fold the 1st mark so that it lines up and touches the 2nd mark, creating little pleats on each side. Secure in place with a basting stitch about 1/8" from the edge.
Grab your 2nd exterior piece and repeat.

Place your two Exterior pieces right side together (I didn't, but you can secure together with a few pins if you'd like). Making sure your frame is no less than 1/4" from the top of the Exterior panels, center on your fabric. Mark a line 1/4" away from the frame all the way around, extending about 1/4" past the hinges on each side.
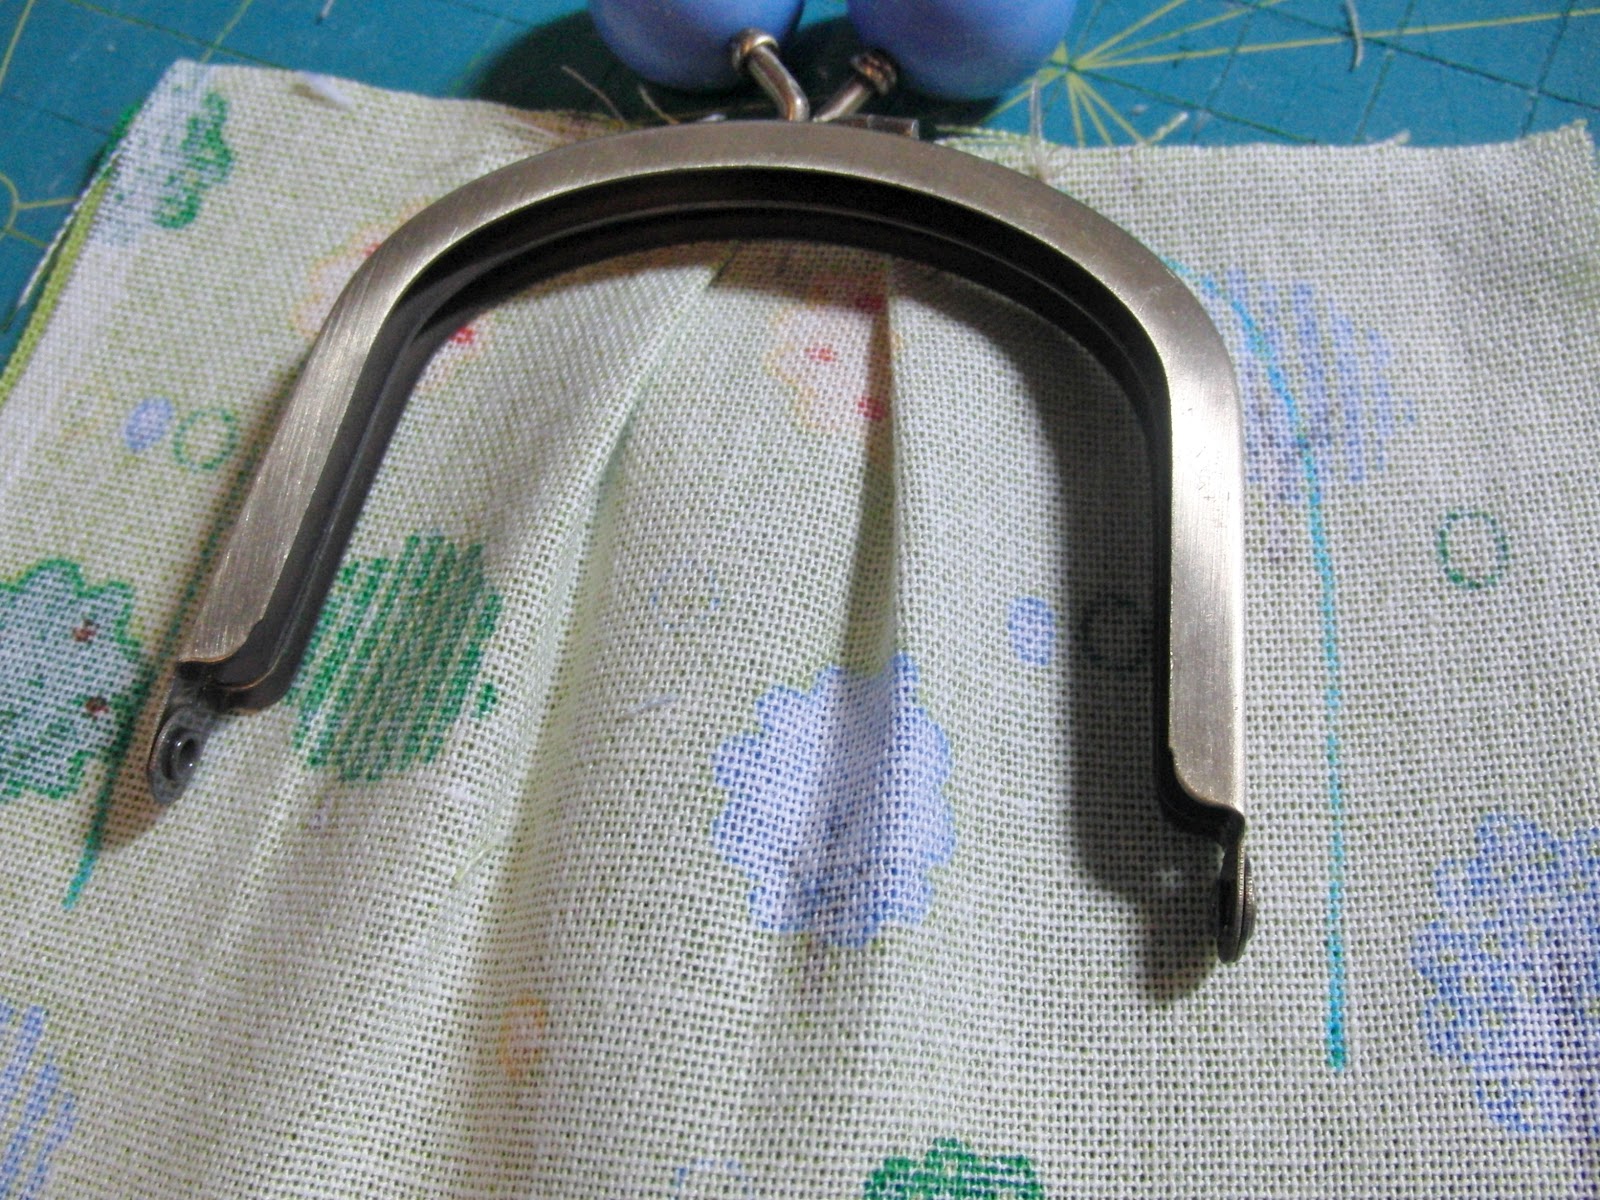
Using a ruler, mark a line from the end of your frame arc to the bottom corner. Do this for both sides. Cut through both layers along the line to create your pouch Exterior.

Place your 2 Lining pieces right sides together (pin in place if you're having trouble with them shifting). Lay one of your Exterior pieces on top, align, and trace around the outside. Cut through both Lining layers along the line to create your Lining pieces.


...aaaand I just realized I forgot to take pictures of this next step (GAH!), but what you'll do is place your two Exterior pieces right sides together, and pin in place. Starting at the spot where the curve and the straight line meet (I like to think of it as the pouch's "waist"...lol), sew a 1/4" seam all the way down to the bottom point. Repeat for other side.
Leaving it wrong sides out, pull your Exterior pieces away from each other so they're no longer lying flat. It should look like a little tube of sorts, connected along those linear bottom sides.
Grab your Exterior circle, fold in half, and finger press the seam. If you want, on the wrong side of the circle, you can mark two little notches where the fold is (sometimes those folds can be hard to see...if you look on the left and right edges of the photo below, you can see my little blue lines).
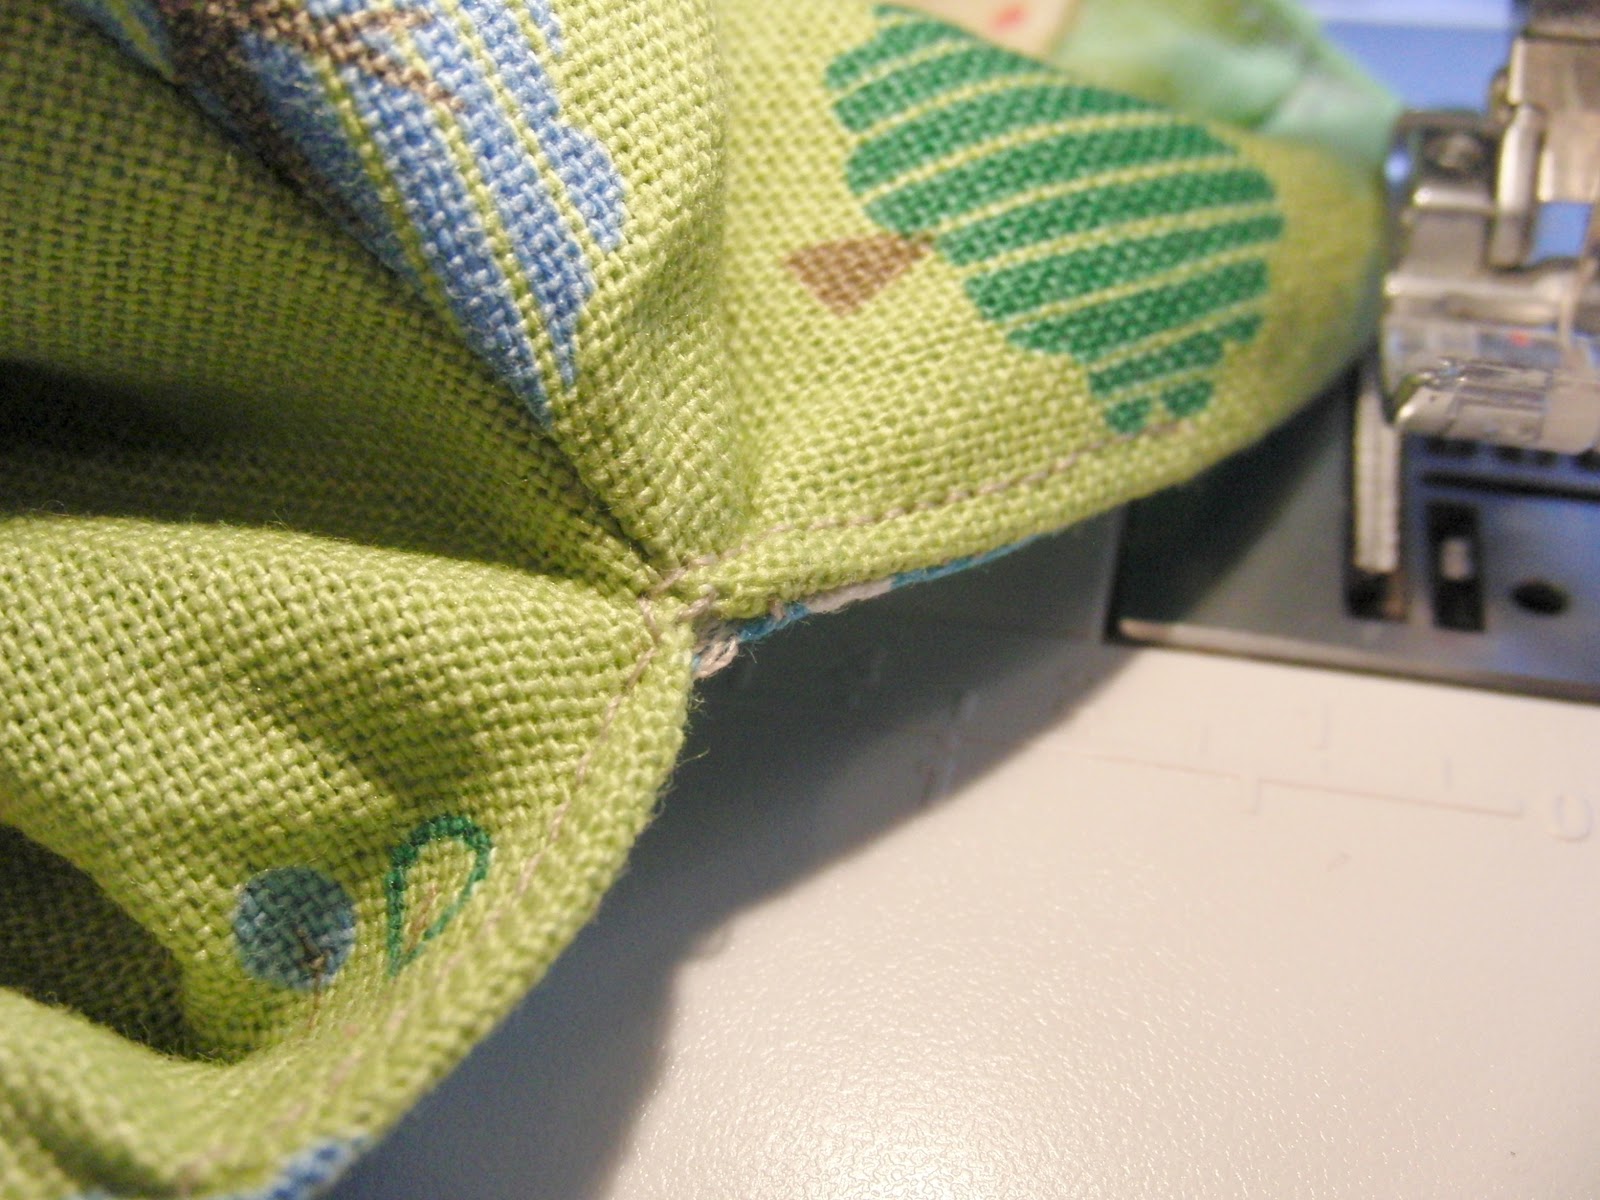
Line up the seams at the bottom of your Exterior tube with each fold line/mark. Pin in place. Now that you have two pins in place, you can start edging the sides of the Exterior along the edge of the circle. You can see how I started pinning one side of the circle in place below, before moving on to the next.

Once you have your circle pinned to the bottom, flip it over and sew a 1/4" seam all the way around. It's easier to sew from this side because you can make sure all that fabric stays out of your way and doesn't get caught in the seam. It also allows you to prevent little "pinches" in your seam where it tries to bunch on you.

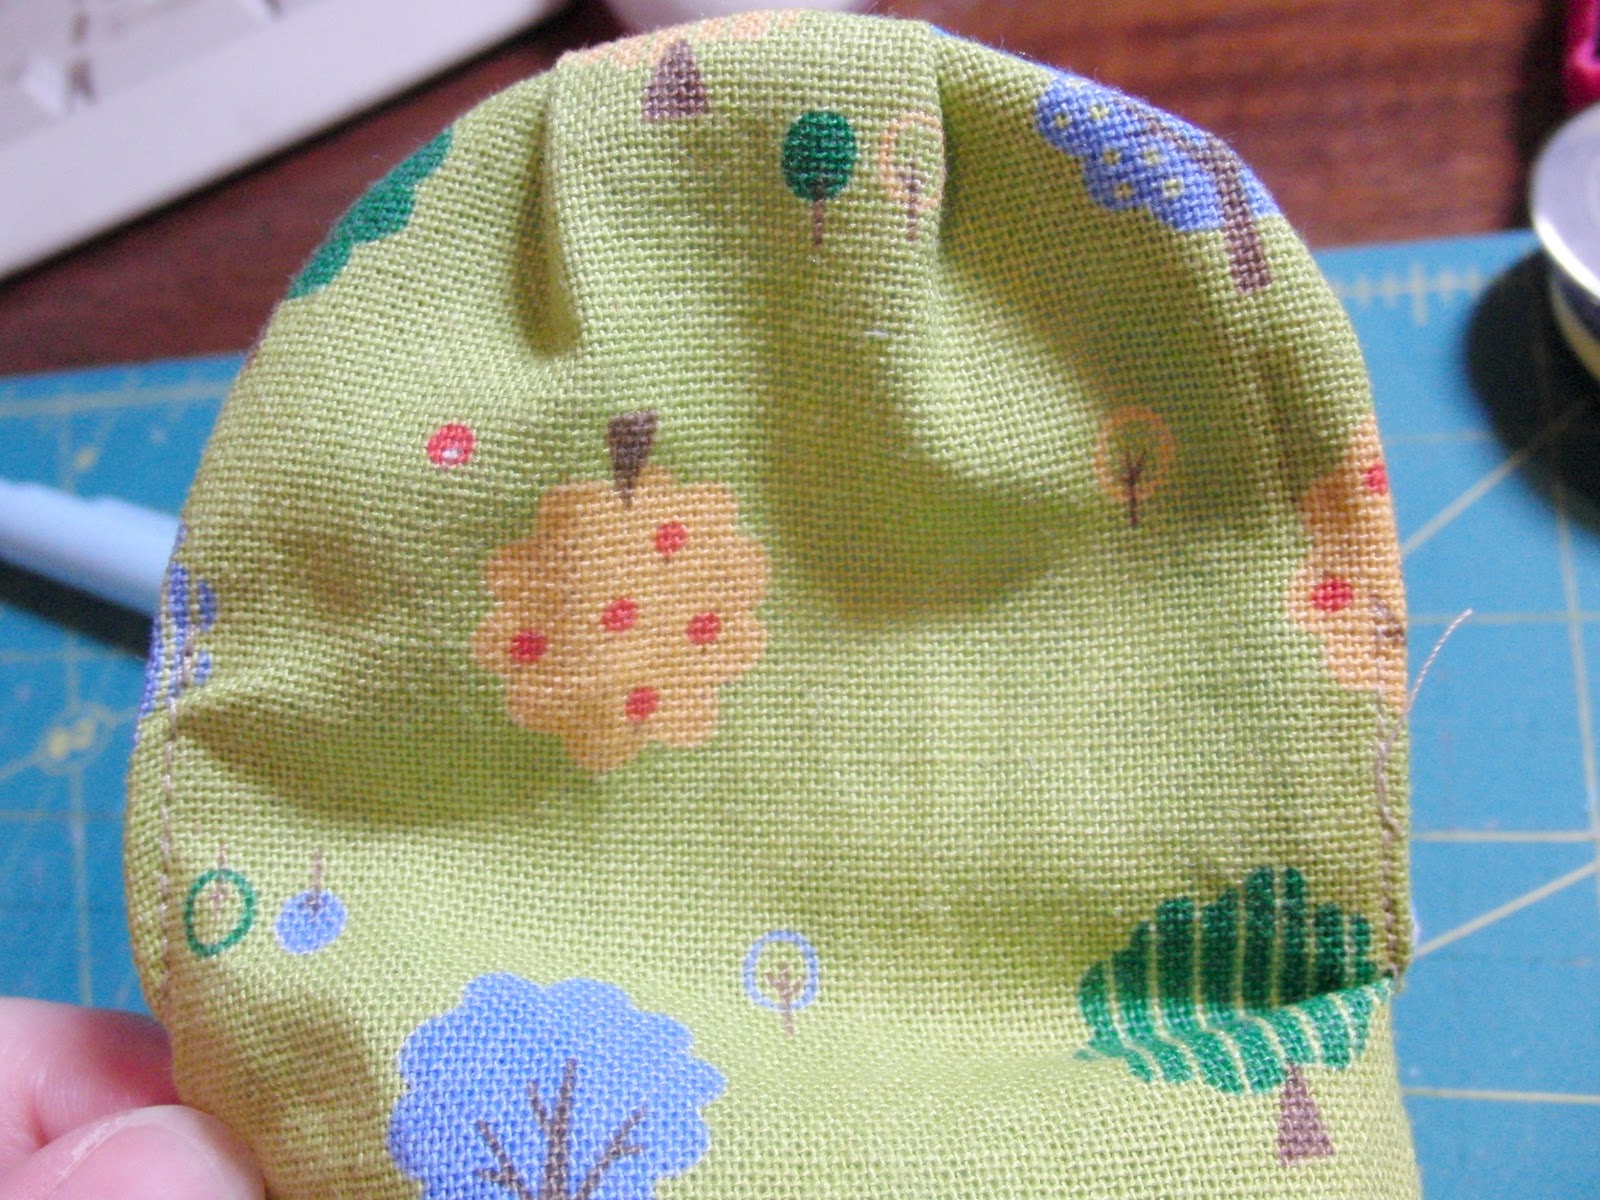
It should look something like this when you're done.

Cut notches all the way around the bottom.

Repeat for Lining pieces. When finished, turn your Exterior right side out, and snuggle it inside the Lining so that they're right-sides together.

Line up the rounded tops of the Lining & Exterior on one side, and pin in place.

When you get to the other side, be sure to leave a small 1-2 inch opening at the top.

Starting on the side with the opening, begin sewing from the pin that marks the right edge of your opening, and sew down the right side just until you reach that side seam. Watch your Exterior piece underneath as you get close to that existing seam, because it can curl in on itself a little, and you might not catch it in your seam if you're not careful.

Flip to the other side (the "mouth" of your pouch will be wide open, as if you're jamming its face down on the sewing machine). Making sure you haven't caught the side you just sewed underneath, begin sewing just after that pesky side seam.

Sew happily along the entire curve of this side, since you don't have to leave a pesky opening here. Again, stop a hair before the side seam, flip around to the other side, and sew until you reach the pin marking the left edge of your opening.
When you're done, it should look something like this on the inside...

Turn right side out through the opening.

Iron the edges to set. Pin the opening closed, and sew a seam 1/8" from the edge to close (this is important because you want it to be hidden inside the frame).

Now, this part isn't necessary, but I think it makes the pouch look more polished, I like to edge-stitch along the exposed part of the pouch that doesn't fit inside the frame. Starting about 1" above the hinge-curve, sew a seam 1/8" from the edge. As you approach the curve, tug your fabric so that it fans out away from the needle. I slow my sewing down around the curve so I can smooth out any bunching as I go. Stop when you've sewn about 1" up the other side as well.

Make sense?
How about now?
Now that we're done with all that, it's time to glue the pouch into the frame. Starting from one end, work a thin layer of glue around the inside of one side of the frame. I use Gutermann Creativ glue purchased from While Baby Naps on Etsy. Me and all of my frame-pouch making friends swear by it. It's the bees-knees.
I know $11 might seem like a lot for one tube of glue, but it lasts FOREVER. I've been using the same tube for about a year and a half, and still have about 2/3 left.

Once you've finished applying your glue, quickly work one side of your pouch inside, making sure it's tucked up all the way in there on both sides. If you have trouble using just your fingers, a butter knife works well to help jam it up in there. I'm dainty like that ;)

Sit back and let it ruminate (while I illuminate the possibilities...). After about 10 minutes or so, I use a pair of clampy things to pinch the frame more tightly around the fabric. A lot of my friends skip this step, but it doesn't hurt, and I'd rather be safe than sorry.
I picked up my clampy things in the jewelry-making section at Joann's. No idea what they're actually called, but I like them because they have those little white foamy pads that keep the frame from getting dents/grooves when you clamp it.

Let your pouch ruminate a little more. About 30 minutes to an hour...or the length of an episode of Parks & Recreation, which is usually my gauge. You want the glue to set a little bit so that the side you've already done doesn't tug free while you're wrangling the other half into the frame.
Repeat glue and clamping process for the other side, and let your pouch sit for a while. I usually leave mine open like this so it can dry nice and good-like before I close it.
I looks kind of sad though now that I stare at it...like a fish gaping for oxygen. I'm sorry little pouch, but it's for your own good *pet pet*

And voila! Once it dries, you have one happy little pouch!


0 comment:
Post a Comment