
Bookshelf quilts are easy to put together and leave plenty of room for improvising with scraps and adding fun details.
You will need:
13 various scraps for your books **see cutting step #1**
Various scraps of white fabric or another neutral, background color
1" x 20" strip of gray, brown, or other bookshelf colored solid fabric
Selvages or textual fabrics for book titles
Steam-a-Seam 2
Fat quarter for the background
Binding of your choice
Cutting Instructions:
1. From your various book fabrics, use the list below to cut your books. Feel free to adjust these guidelines as necessary, to best suit the fabric you're using.
Book #1 - 2" x 10"
Book #2 - 1" x 12"
Book #3 - 2" x 6.5"
Book #4 - 1.25" x 9"
Book #5 - 1.5" x 11"
Book #6 - 1.5" x 9.5"
Book #7 - 2.5" x 8.25"
Book #8 - 1.5" x 9.5"
Book #9 - 1" x 10"
Book #10 - 2" x 11"
Book #11 - 1.75" x 12"
Book #12 - 2" x 12"
Book #13 - Up to you! This is your leaning book, and should be at least 18" long or longer, depending on how much of a lean you're going to create for your last book.
2. From your background fabric, cut:
1 - 2" x 20" - This piece will sit under the "bookshelf"
1 - 1.5" x 15" - This piece will be used for sashing on the left side of the books
1 - 2" x 3" - This piece will sit on top of your leaning book
1 - 6" x 15" - This piece will be the right side of your leaning book
1 - 4" x 12" - This piece will be to the left of your leaning book
1 - 10" x 2" - This piece will sit at the bottom of your leaning book
1 - 10" x ??" - Use scraps here, if you've got them. We will use these pieces to make the negative space above the books.
3. From your binding fabric, cut 2.5" strips to yield 98" of binding. If you are cutting WOF, this is a total of two 2.5" strips.
4. From your bookshelf fabric, cut a strip, 1"x24".
Sewing Instructions:
1. Lay out your various 10" long pieces of background fabric. Pin each of your book fabrics, 1/4"-1/2" apart, right sides together, raw edges aligned. It should look something like this.
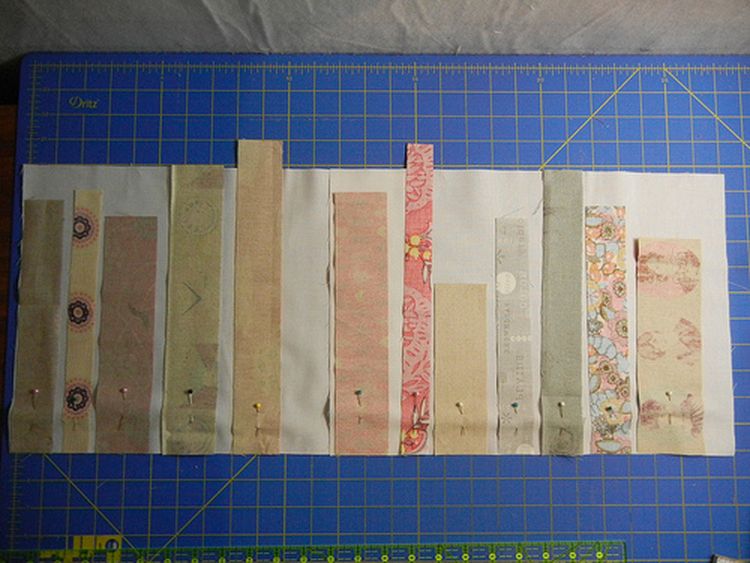
Sew a 1/4" seam down the length, and press seams open. Then trim your pieces to match the width of your book. Trim each book plus background strip to a uniform 15" tall.

2. Pair the books together and set your leaning book (#13) off to the side for now. Sew Book #1 to Book #2, right sides together, raw edges aligned, then Book #3 and Book #4, and so on until you have sewn all of the books in pairs. Press seams open.

3. Continue to seam the book pairs together, right sides together, raw edges aligned until all of your books are together in one solid piece. Press all seams open. Set aside.

4. Add your 2" square of background fabric to the top of your leaning book (#13), right sides together, raw edges aligned. Sew using a 1/4" seam. Press seams open. Next add the 4" x12" piece to the left side of your leaning book, right sides together, raw edges aligned. Sew using a 1/4" seam, and press seams open. Do the same with the 6" x 15" piece of background, adding it to the right side of the leaning book. Finally, add the 2" x 10" sashing to the bottom of your leaning book. It should now be sashed around all four sides.
5. Next, it's time to line up your leaning book. First, lay your bookshelf so far on your cutting mat, then lay your leaning book beside it, as you see below.

Try to line up the leaning book so that the bottom left corner of the book matches the bottom of the other books. Then, measure 1/4" inch from where you've decided to place your leaning book, take a deep breath, and cut.

Seam leaning book and bookshelf together using a 1/4" seam, right sides together, raw edges aligned. Press seams open and your shelf should be starting to look complete.

6. Trim leaning bookshelf to match the other books. For the right side of the leaning book, line your ruler up with the right edge of the bottom of the leaning book, and measure 1.5" inches to the right (even though the picture seems to indicate otherwise!). This is where you will make your cut.
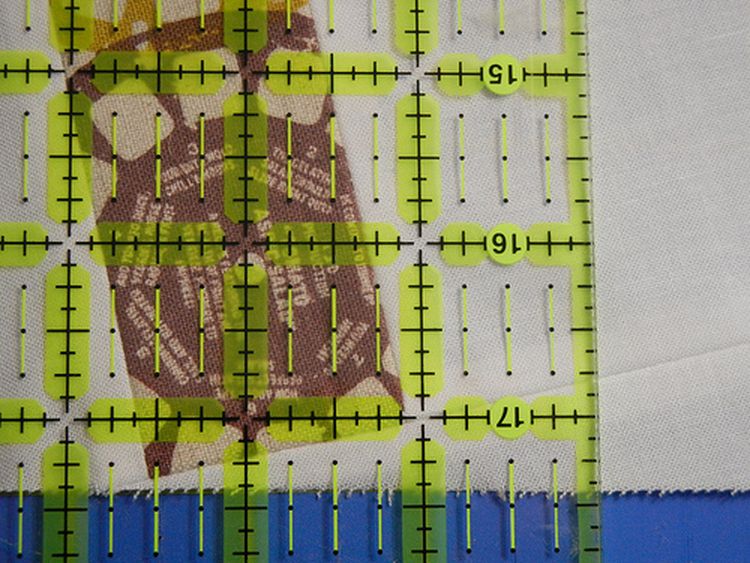
Also trim the top of the books to a uniform 15" tall.

7. Add a strip of 1.5" x 15" strip of sashing to the left side of the books, matching right sides together and seaming with a 1/4" seam. Press seam open.
8. Take your 1" x 20" strip of bookshelf material and seam to the bottom of the books, right sides together, raw edges aligned, using a 1/4" seam. Press seam open.

9. Next, seam your 2" x 20" strip of white/background fabric and seam to the bottom of the bookshelf, right sides together, raw edges aligned, using a 1/4" seam. Press seam open. You have now completed the top of your miniquilt!
10. And now for the book titles. Take your selvages and/or textual fabrics and trim as desired - but leave approximately 1/4" excess fabric all the way around. Cut a piece of your double-sided fusible web (Steam-a-Seam or similar) to match, and peel off one side of the web. Add your fabric here.

Use the tip of your hot iron to get your book title to stay put, then go back to your cutting mat and trim your web more precisely to match the fabric (which will still be slightly too big). Use your iron to press your webbing in place well, then trim your book title down as desired.

To add title to a book, peel the backing of the web off, place the title where you'd like it, and iron it on. Ta da! Make sure your iron is nice and hot for this step.

11. Baste miniquilt, batting, and backing together. I used spray baste, which is super wonderful and makes the quilting so much faster!
12. Quilt to your heart's content, as desired. I recommend sewing down the edges of the book titles you have added, for extra security and because it looks nice. It's entirely optional.

13. Bind, and enjoy!

I hope you enjoyed this tutorial, I know I enjoyed making another one of these miniquilts.
.jpg "Bookshelf Quilt Block Tutorial")
.jpg "Bookshelf Quilt Block Tutorial")
.jpg "Bookshelf Quilt Block Tutorial")
.jpg "Bookshelf Quilt Block Tutorial")
.jpg "Bookshelf Quilt Block Tutorial")
.jpg "Bookshelf Quilt Block Tutorial")
.jpg "Bookshelf Quilt Block Tutorial")
.jpg "Bookshelf Quilt Block Tutorial")


0 comment:
Post a Comment