
Ruffle Tote Bag Tutorial. Shabby Chic | Rag quilt purse, Bags tutorial, Fabric bags


One of the things about this bag that I loved was the large flower!! Hers was made differently but once again, you do what you can with what you've got!! :) I had a 3" wide strip of fabric left over. That was it! I scrounged around my craft room and found some gathered ivory lace, rose color sateen fabric scraps, and ivory felt. Pair these items up with the 50" strip of fabric left over and this is what you get!
I cut a 4" circle. Glue one layer of lace around the outside edge first. Then the fabric ruffle I created from my left over piece...2 layers of lace after that, then a rose sateen rosette in the center. That flower is at least 5" across! I love it!

Inside the bag you'll see 2 zipper pockets...hUge zipper pockets! Enough space in those pockets to hold my personal belongings then the tote portion of the bag is great for large notebooks, Bible's, and crafting projects I'm working on. I LOVE this bag!

I chose to NOT use any type of closure for this bag. It is so tall that a person would have to dig deep to reach anything, and then all my personal items are behind a zipper anyway.
Materials Needed:
1 1/3 yd outer fabric, 1 yd lining fabric, 2 yards heavyweight fusible interfacing, coordinating scrap fabric for flower, thread, 2 12” zippers
Ruffle Tote
2 16x20 main body piece
2 5x23” handles
8 3” x 32” ruffles
Lining Fabric
2 16x20 main body pieces
2 13”x23” pocket pieces
Interfacing
2 16x20
Step 1.
Cut all fabric and interfacing pieces. Adhere interfacing to corresponding outer fabric pieces.
Step 2.
Insert zipper pockets.
Lay your pocket fabric onto your lining fabric (or outside piece of fabric if you are choosing to do a zipper pocket on the outside of the bag) with right sides together. I wanted my pocket to start abotu 5" down from the top, but you determine where you want yours to be. Keep in mind seam allowances! Measure down from the top of the pocket fabric piece 1 1/2" and make a mark. Make another mark at the 2" line. Move over about 8" to the other side of the pocket piece and mark the same measurements.
You will be drawing a rectangle using these four marks. I also like to begin my zipper about 1 1/2" from either side of the pocket piece. That means that the short ends of the rectangle should be 1 1/2" from either side of the pocket piece of fabric. Pin your two fabric pieces together and then sew over top of the rectangle you just drew.
See photos below:

After you have sewn over top of the rectangle, make a snip down the center of the rectangle. Cut all the way down the rectangle. Stop at 1cm away from the end and then cut into each corner. MAKE SURE YOU DON'T CLIP THE SEAMS!! Take the pocket fabric and stuff it inside the hole you just cut.
See photos below:

Smooth out the pocket fabric on the back so that it is laying flat. Iron around your rectangle and pin in place. Place the zipper behind the rectangle. Pin in place. After you've done a few of these, you won't really need to pin it. With a small seam allowance (1/16"), sew zipper to the back of the rectangle.
See photos below:

Once your zipper is in place, flip the whole thing over. Now it's time to create the actual pocket. Fold the pocket piece in half witht he pretty side of the fabric inside.
Pin all the way around the 3 open sides. Beginning at one side, sew up all three open sides. Don't forget to backstitch at both ends for sturdiness.
See photos below:

Step 3.
Assemble lining
With right sides together, pin down each long side and bottom. Sew sides and bottom (not squares)
using 3/8” seam allowance. Leave a 6” hold in the bottom of the lining for turning the bag. Zigzag stitch the edges to finish the seam.
Pinch the inside corner of the squares and pull apart. This creates a 4” long straight line. Pin closed and sew using a 3/8” seam allowance. Zigzag stitch the edges to finish the seam.

Step 4. Assemble the handles

Press ½” inward down the length of the handle. Repeat for other side of handle. Fold handle in half and press. Pin handle in place and sew open side closed with a small seam allowance. Flip handle over and sew down the length of the other side with the same small seam allowance.
I prefer a few lines of stitching especially on a wide handle such as this one. You can see I created 5 lines of stitching. I simply flip the handle and use the edge of my presser foot as a guide.
Step 5. Assemble the ruffles
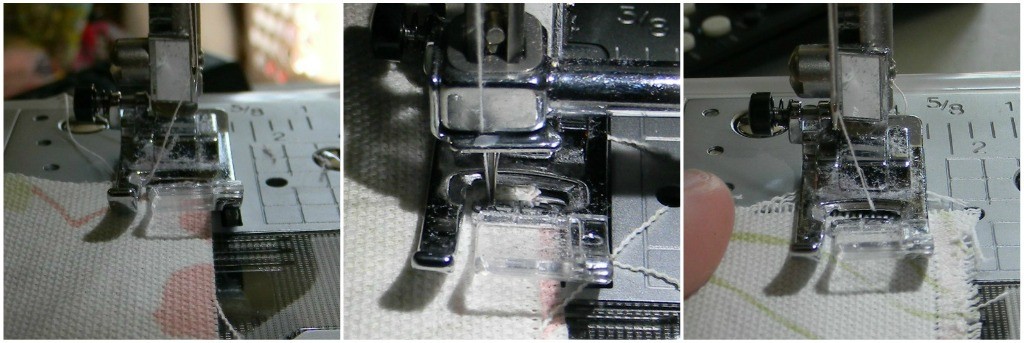
Zigzag stitch down both edges catching the edge of the fabric as you go. If you have a serger, serge the
edges. Repeat for all 8 ruffles. As you can see in the photos below, the needles is lined up with the edge of the fabric just catching it. It creates an edge similar to what a serger does.
Ruffle your ruffles:
Baste stitch down one long side of a ruffle about ¼” away from the ruffle edge. DO NOT BACK STITCH AT EITHER END. Gather each ruffle to 16” in length.
Pin the ruffles to the outside pieces of the bag.

Measure 3 ½” up from the top of the squares cut out of the bottom of the main body piece. Pin the
ruffle to the main body piece. Sew in place approximately ¼” below your basting stitch. Seam rip the
basting stitch. Repeat these steps for the next 3 ruffles, placing them where you want them to lay. For
this bag, the ruffles just skim each other. There is no space in between each ruffle and they do NOT
overlap.
REPEAT RUFFLING STEPS FOR THE SECOND MAIN BODY PIECE
Step 6. Assemble Main Bag body
With right sides together, pin all the way around the edge. Sew in place using a 3/8” seam allowance.
Be sure you are catching all the ruffles within the seam allowance. Do NOT sew the squares shut.

Boxing the bottom: Grab the inside corner of the squares you cut from the bottom of the main bag
pieces. Pull them apart. This will create a straight line. Pin in place. Sew together using 3/8” seam
allowance. Repeat for second square.

Step 7. Assemble the Bag
Turn lining wrong side out and outside fabric right side out. Measure from the side seam in about 2 1/2” on the outside portion of the bag.

Pin one end of the handle here. Measure 2 1/2 ” in from the other side seam and pin the other end of
the handle here. Repeat this step with second handle on the other side of the outside portion of the
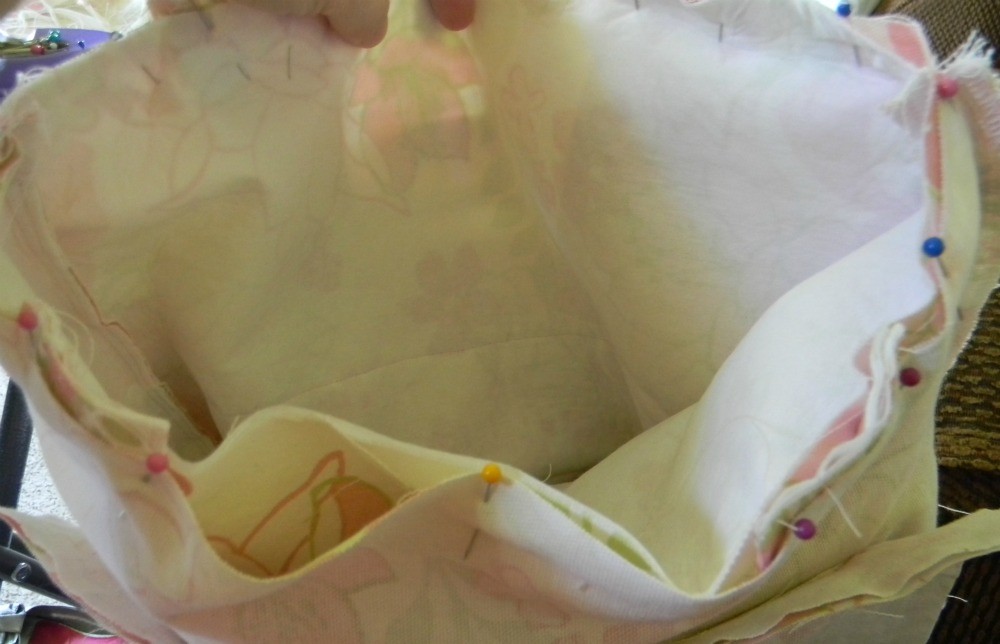
bag. Slide outside portion of the bag inside the lining portion of the bag.

Align the side seams and pin in place. Pin all the way around the top edges of the bag.
Sew along the top edge of the bag using a 3/8” seam allowance. Backstitch over the handle portions 6-8 times for added security. Turn bag right side out and stuff lining into the outside portion of the bag.

Use your scissors to poke out all the corners of the bag. Pin along the top edge of the bag…pulling apart the fabric as you go.

Topstitch the top edge of the bag using a 1/8” seam allowance.

Close up the hole in the lining by tucking the raw edges of the fabric inside the hole. Press and pin place. Sew closed with a tiny seam allowance.


0 comment:
Post a Comment