
DIY ACCORDION COIN PURSE WALLET/ FREE PATTERN/ Card & Coin Purse / sewing tutorial
So before you start a few quick pointers:
1) I would add 1 - 1.5 inch to the fabric for the flaps, as the flaps for my pouch are shorter it is very hard to pull the flaps to reach the buttons, so I can't cram as much as I would like to into the pouch.
2) I can't read Chinese so I wasn't too sure how to use the template. From the original pictures they used a large seam allowance and sewed around the interfacing. So I would estimate you are supposed to use the templates for your interfacing and trace slightly large fabric pieces from the template as best as you can (these don't need to be perfect if you are sewing around the interfacing anyways).
What you'll need
Copies of the template. Click on the images, right click to Save As, and print to fit an a4 size sheet of paper.


Outer fabric pieces
1 x body of bag from template A
1 x long flap from template B
2 x short flap from template B
Interfacing - iron on heavy weight- 2 cut from each of template A and B
Lining fabric pieces
1 x body of bag from template A
1 x long flap from template B

2 x metal snap prong buttons

For what to do keep reading after the jump
What you'll need to do
As mentioned in the notes above you should use your template for the interfacing pieces and create fabric pieces slightly larger than the template. I forgot this, so it may account for why my flaps are short (as you can see I cut the fabric to the template and shortened my interfacing instead).

If you have not already done so, iron all the interfacing pieces to their corresponding fabric pieces.
Grab the two short flaps from template B and sew around all the edges, leaving the straight edge at the bottom to turn the whole thing through.

Turn the short flap through the unsewn edge and topstitch around the edges you have just sewn.

Now grab the two long flap pieces and sew around the two long edges and the top curved edge, again leaving the bottom edge unsewn.

Turn the whole thing through the opening in the bottom edge.

Fold the open edge of the long flap in on itself so the cut ends of the fabric are tucked away neatly.

After you have folded the edges in, iron it shut and topstitch around the whole thing.

Grab the lining for the body of the pouch, cut from template A.

Fold the body of the pouch in half, creasing it to leave a visible mark.

Now fold the short flap in half. Align the two halfway lines on the body of the bag. Sew the short flap in place.

Grab the outer fabric body of the pouch and lie it good side down on top of the lining of the body of the pouch, with the short flap sandwiched between.
Sew around the whole thing, leaving a gap to turn it through. The best place would be along the bottom straight edge opposite the short flap.

Turn the pouch right side out and topstitch around the whole body of the pouch.
Have a look at the template A, you basically need to fold your fabric on those dotted lines, so you end up having something like this happen:

You will also need to fold the body of the pouch in half lengthwise and crease it visibly. Also fold the long flap in half and align these two together. Sew along that line (the black one in the picture above).
Grab the template A paper cut out and align the line you have just sewn with the halfway line marked on template A.
Fold the body of the fabric along with the paper template.

You should end up with fold lines like this:

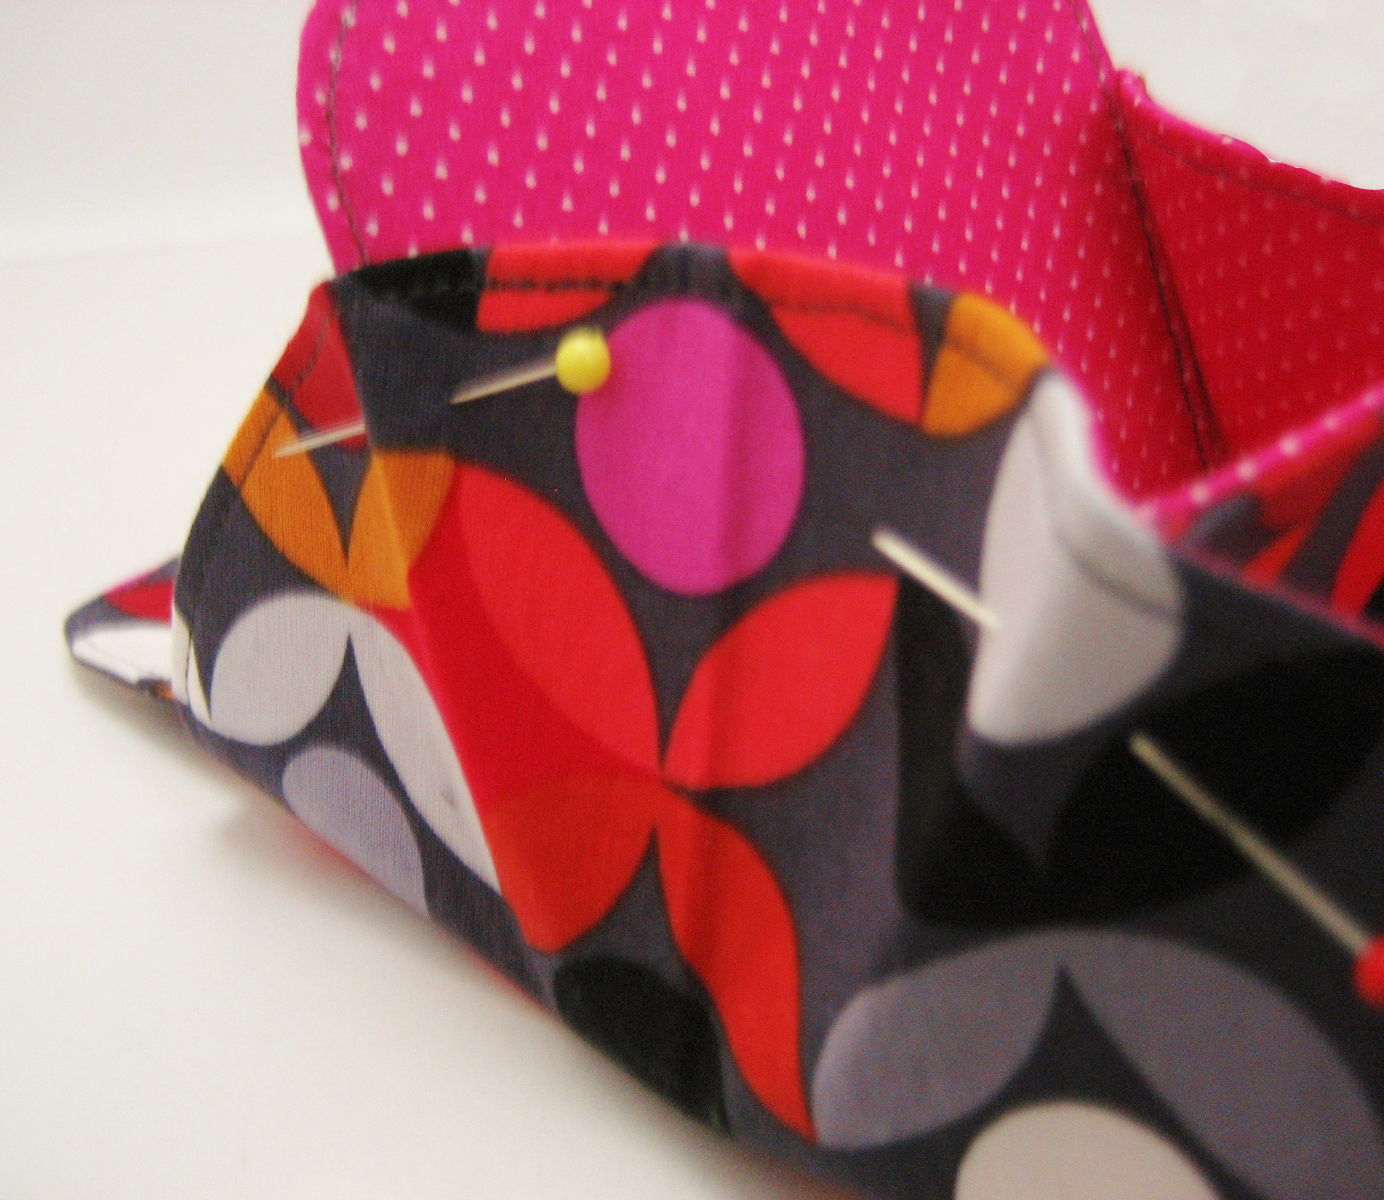
Now you need to insert the bottom half of the long flap in the first body fold from the bottom, and the flap end of the long flap in the second body fold from the bottom. The pictures make more sense, trust me.

The fabric will be quite thick to pin along, so just jab them straight through. You can either sew along these fold or use rivets.

Now all you need to do is attach the metal snap buttons to the pouch, for a free tutorial on how to do this with normal pliers see here.

Once the buttons are attached you have completed the double flap pouch with three separate compartments!

Happy Crafting!


0 comment:
Post a Comment