
This fun bag sewing pattern is perfect for an advanced beginner. The asymmetric shape of the fold over flap makes this bag a real eye catcher! There is an additional zipper pocket on the back of the purse. This project will also teach you how to install a top zipper closure. Enjoy!
Finished measurement:
Approx. 8” x 12” x 2” (with flap folded down)
All seam allowances are 3/8” unless otherwise stated. All measurements given are height x width. Please read all instructions before you begin.
You need:
– Exterior fabric: 5/8 yd (44″ width)
– Lining fabric: 1/2 yd (44″ width)
– Fusible fleece: 1/2 yd (45” width)
– Fusible interfacing (mid-weight): 1 yd (20” width)
– 1 zipper, at least 11”
– 1 zipper, 7”
– 2 rectangular rings or D-rings, 3/4″ wide
Cut from:
Exterior fabric:
– (2x) 15″ x 12 3/4” – main body
– (1x) 3 1/4″ x 44” – strap*
– (2x) 3 1/4″ x 2 3/4″ – strap extender
– (2x) 1 1/2″ x 2” – zipper tabs
* I used the whole width of my cotton fabric for my strap. If you want your strap to be longer than 44”, simply cut another piece of fabric and lengthen the 44” piece by placing and stitching it right sides together with the attachment piece (see pictures at the end of step c).
Lining fabric:
– (2x) 15″ x 12 3/4” – main body
– (1x) 13” x 9” – zipper pocket
Fusible fleece:
– (2x) 15” x 12 3/4” – exterior main body
To reduce bulk, you may cut all fusible fleece without the seam allowance of 3/8” i. e. cut it 3/8” shorter on all sides.
Fusible interfacing:
– (2x) 15” x 12 3/4″ – lining main body
– (1x) 1 1/2″ x 44” – strap
Instructions
a) Prepare the fabric pieces
Always iron fusible fleece and fusible interfacing onto the wrong side of the fabric.
Interface fusible fleece to:
2 x exterior main body
Interface fusible interfacing to:
2 x lining main body
1 x inner slip pocket
1 x strap*
*Place the piece of fusible interfacing for the strap centered onto the wrong side of the strap fabric piece and iron (see picture below).

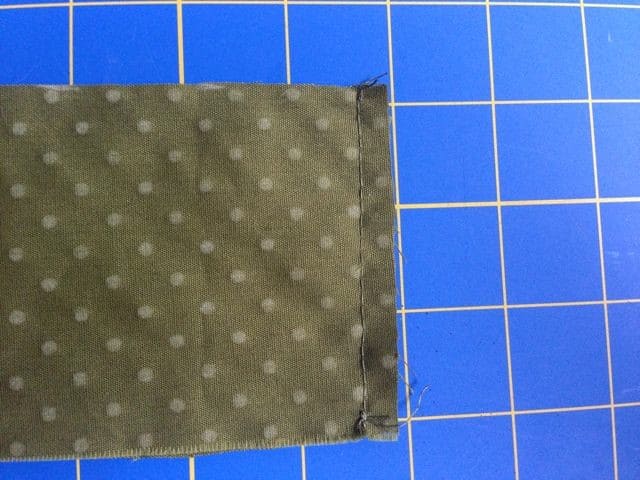
– On one of the exterior main body panels measure and mark 4 1/2” down from the top left corner. Use your ruler to connect this mark with the top right edge and draw a line. Cut along this line and discard the scraps. Do the same with one of the lining main body panels. This means you will cut one piece of exterior fabric and one piece of lining as shown in the image below.

– IMPORTANT: Since this pattern has an asymmetric shape both the other exterior main body panel and lining main body panel need to be marked 4 1/2″ down from the top right corner and cut to the top left edge. Refer to the picture below for help – this is what you should come up with after cutting both main body panels of the exterior fabric.

b) Make the zipper pocket
– Place the exterior main body panel that has a short left edge and a long right edge right side up and measure and mark 8 1/2″ up from both bottom edges and connect both marks with a horizontal line. This crease mark shows you where the bag is going to be folded over later.

– Draw another horizontal line 3/4” down from the center crease.
– Fold one of the zip pocket pieces in half horizontally and press to find the center of the fabric piece.
– Place the zip pocket fabric piece right side down on the main body: the center crease of the zip pocket piece should be aligned with the 3/4” line on the main body panel. Make sure the zip pocket lies centered on the main body panel.
– Find the right spot for the zipper: Measure 3/4″ down from the center crease of the zip pocket and draw a horizontal line; Now measure 3/8” down from this line and draw another horizontal line: this is the slot for your zipper; make it 7” wide and make sure it’s centered on the zip pocket fabric piece (see image below).
– Topstitch along the rectangular marking (you will be sewing through the zip pocket and the main body panel). Refer to the red line in the picture below.

– Starting and stopping approx. 1/4” from the short edges, cut the slot open: use a seam ripper to get a small hole started and cut a straight line along the whole rectangle. You will be cutting through the zip pocket fabric and the main body panel. At either end of the rectangle (i.e. at the short ends) cut a triangle with your scissors, be careful not to cut into the stitching (refer to the white line in the picture above).
– Pull the zip pocket fabric through the hole you just cut, so that it is now touching the wrong side of the main body panel and press.
If you want to you can make the lining show a bit on the front side, like I did in this case.

– Place your zipper right side up and put your fabric piece (with the slot you have just cut) right side up on the zipper, so that the zipper lies exactly in the opening. Pin in place and stitch around the rectangle, approx. 1/8” from the edges to fasten the zipper (use the zipper foot of your sewing machine). You will be sewing through the main body panel, the zip pocket fabric and the zipper tape.

– Flip the fabric piece to the other side so that you can see the wrong side of the zipper and the zip pocket fabric.
If necessary, trim the ends of the zipper, so that the zipper isn’t longer than the zip pocket fabric piece.
– Fold the zip pocket fabric down so that the zipper is covered. All edges of the zip pocket fabric should be aligned and the right sides should be touching.

– Pin in place and stitch along the two side edges and the bottom edge. Make sure the stitching does not go through the main body panel but only through the zip pocket fabric.

c) Make and attach the strap extender
– Fold one of your strap extender fabric pieces in half horizontally, wrong sides together, and press. The strap extender will still be 2 3/4″ wide after folding. Open up again and fold both long edges towards the middle crease and press again. Fold horizontally again, matching the two long folded edges. Press. Your folded strap extender should now measure 3/4” x 2 3/4”.


– Topstitch along both long edges using a 1/8” seam allowance.
Slide one of your rectangular or D-rings over the extender and place it onto the right side edge of one of the main body panels, 1″ down from the crease mark you made in step b): The rectangular or D-ring should be facing the main body panel and the raw edges of main body panel and strap extender should be aligned. Stitch the strap extender down using a 1/4″ seam allowance.

– Repeat for the second strap extender piece and place it on the other side edge of the main body panel.
– Repeat the folding and stitching of step c) for the strap. Set the strap aside.
If you would like to make a longer strap simply cut another piece of fabric and lengthen the 44” piece by placing and stitching it right sides together with the attachment piece (refer to the pictures below for help).


d) Attach the top zipper
If your zipper is longer than 11” measure and mark 11” up from the bottom stop and place the zipper pull to this marking before proceeding with the next steps.

– Fold one of the 1 1/2″ edges of the zipper tabs down to the wrong side by 1/2” and press.

– Place the zipper tabs with these clean edges onto the bottom and the top end of the zipper, with the tab being placed right next to the zipper bottom stop and the zipper pull. Attach the tab to the zipper by stitching approx. 1/8” down from the clean edge.

– If necessary trim the ends of the zipper, so they won’t be longer than the zipper tabs.

– Place one of the exterior main body panels right side up and put the zipper wrong side up onto the slanted top edge. The upper edges of zipper and main body panel should be aligned (the zipper tabs will stick out a bit). Pin the zipper down and stitch along the upper edge with the zipper foot of your sewing machine, approx. 1/4″ down from the top edge.


– Fold the zipper up, so that you can see its right side and the top edge of the main body panel is folded down to the wrong side. Place your second exterior main body panel wrong side up on top of the upper edge of the zipper. Again the edges should be aligned; stitch along the edge with the zipper foot of your sewing machine, approx. 1/4” down from the top edge.

– Fold the top edge of the lining main body panels down to the wrong side by 3/8” and press.

– Place one of the lining main body panels with the clean top edge onto the wrong side of the zipper, approx. 1/4″ down from the zipper teeth. Make sure the side edges of both lining and exterior main body panels are aligned. Pin in place.
– Repeat for the second lining main body panel and attach it to the other edge of the zipper.


e) Assemble the bag
– On one of the exterior main body panels cut out the bottom corners: in both bottom corners measure and draw a 1 1/4″* square. Cut out along the square marking (indicated with the red lines in the picture below) and discard the scraps. Repeat for the lining main body panels.
* If you want your bag to have less body/to be a little slimmer you may opt for a 1” or 3/4” square instead of 1 1/4″.

– Put the exterior main body panels right sides together. Match up the two sides edges and the bottom edge and then stitch along the two side edges and the bottom edge (you will not be sewing along the two short edges of the notches). Trim the seam allowance.

– Create a 3D shape for the bag (“boxed corners”): Fold one of the bottom corners down so that both the side and the bottom seam are on top of each other. Pin in place and stitch along the raw edge. Repeat for the other bottom corner.


– Repeat from the beginning of step e) for the lining main body panels but leave an opening on the longer side edge of approx. 7” before making the boxed corners.

– After making the boxed corners on the bag lining turn the bag right side out by pulling the exterior through the opening of the lining. Poke out all corners and iron well, especially along the crease mark of the main body to make sure the flap folds down nicely.
– Fold the seam allowances of the opening of the lining down towards the inside and topstitch the opening closed. Tuck the lining into the exterior.

f) Attach the strap
– Slide one of the strap ends over one of the rectangular or D-rings.
– For a cleaner look fold down the raw edge of the strap end and place it onto itself. Pin in place and topstitch (I like to go back and forth several times to make sure the strap is well secured).
You may want to use your zipper foot for this step to be able to stitch closer to the rectangular or D-ring.


Repeat for the other rectangular/D-ring and the other end of the strap. Before you stitch the strap down, make sure it is not twisted.
Congratulations! Your bag is finished.


0 comment:
Post a Comment