
This is a great block to learn paper piecing on and use up scraps at the same time! You can use it to make a mini quilt with several blocks or just use it as I did for a small pincushion.

First things first, you’ll need to gather some supplies and print off the template.
Download and print the template here.

You will need:
The Printed Template
Various scrap fabrics
Piecing thread (I use Aurifil 50wt Cotton Mako)
90/14 Quilting Needle
Small fabric scissors for trimming
Polyfil stuffing
Chopstick or Purple Thang to poke out corners and assist with stuffing
Hand sewing needle and thimble to close the opening
Iron
Small square ruler (5″ or larger)
Rotary cutter
Seam ripper
Lamp, window or another light source
**Optional** – batting for quilting the top of the pincushion (6″ square)
**Optional** quilting thread
After you print your template you’ll want to trim it down outside the faint 1/4″ seam line on the outside edge. I also recommend writing in your color selections in the different parts so you know what fabric goes where. It helps to keep you from getting too confused.

Here are a few colorway examples, you are of course welcome to experiment and choose your own! My rainbow pincushion used the colorway on the left.

You’re going to start with the square in the center marked “A1”. You want to cut a scrap of fabric that is at least 1/4″ larger than that shape. I tend to cut my pieces rather large and just trim down as I go. Once you cut a piece, put on the blank side of the page and hold it up to the light so you can see the lines through it. Make sure it’s big enough!
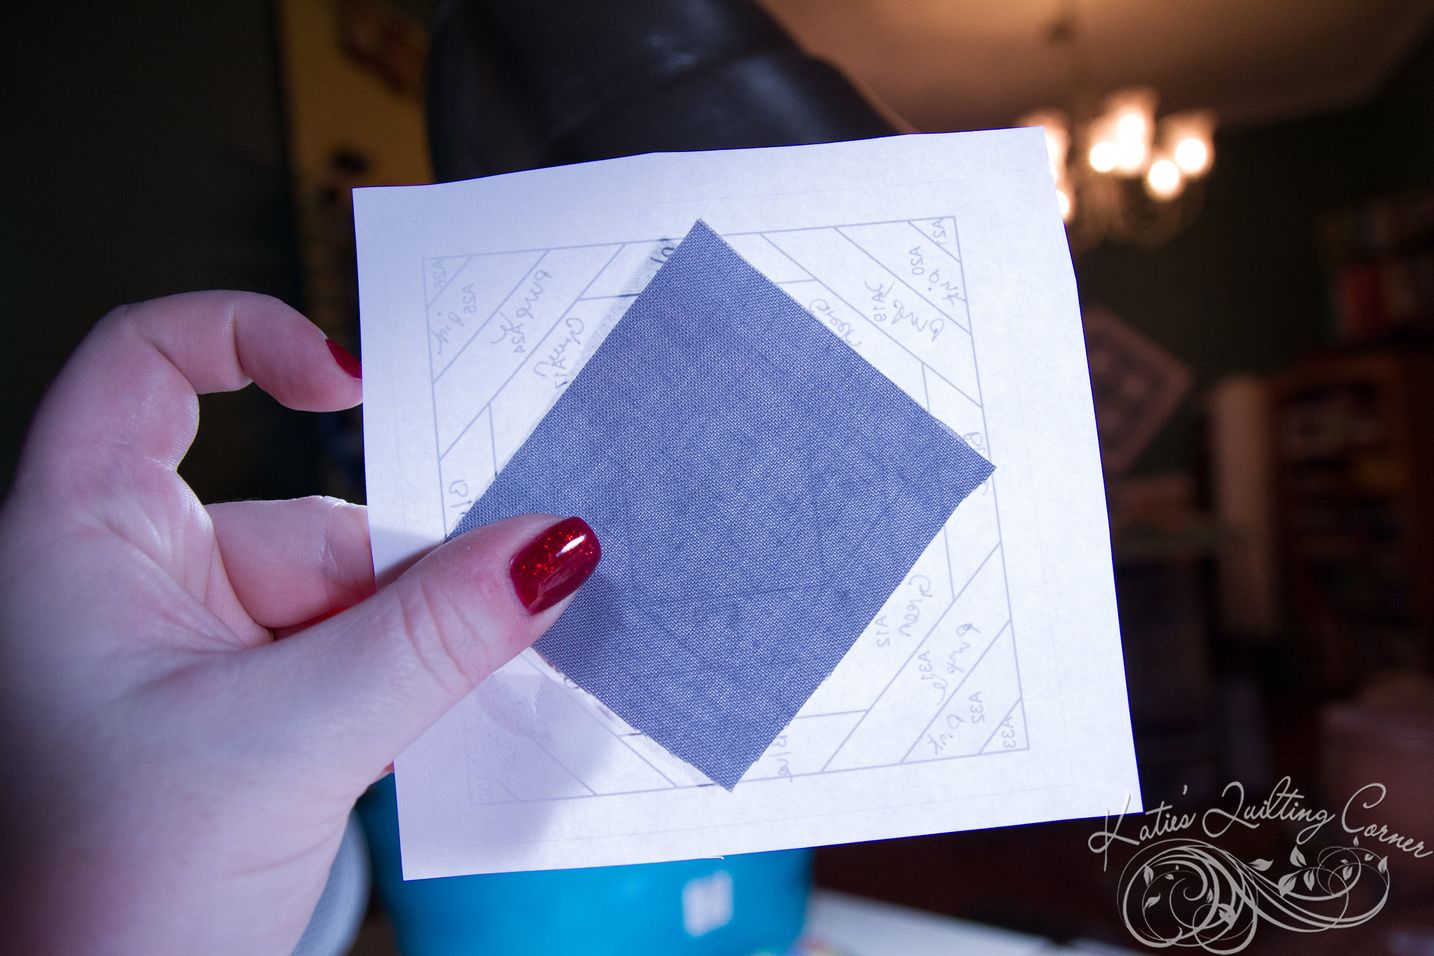
You can use a bit of glue from a gluestick to make sure the first piece stays put. You only need a bit of glue on the first piece of fabric. I don’t recommend using pins since they can distort your blocks.

Now pull the scrap of fabric for the “A2″ section. Mine is red. I’m checking to make sure it is 1/4” larger on all sides for that space. Like I said – I tend to use large pieces.

Now you’ve glued down your center square. Put your A2 fabric on top of it, right sides together. Make sure you’ve got at least 1/4″ worth of both fabrics sticking out into the A2 space (this is when you’ll hold it up to the light and see). I’m using a triangle piece for my A2 fabric. Make sure your A2 piece is oriented just like mine! We’re ready to sew our first seam.

If you’re using prints make sure they are right sides together like this:

Adjust your stitch length to be 1.5 or smaller. You want short stitches here so the paper is easy to remove at the end.

Okay lets sew our first seam! I recommend using a foot that lets you easily visualize the lines you’re sewing on. Mine is an open toe applique foot. It has a guideline right in the middle that I can follow to make sure everything lines up properly. Make sure your fabric is where you placed it and hasn’t shifted. Sew on the line that’s between A1 and A2.


The fabric side of your paper should look something like this:

Fold back your paper on the seam line:

The extra fabric should be sticking out now away from the seam line:

Trim it with your little scissors until about 1/4″ is sticking out.


Now flip your A2 fabric up and press it well with a dry iron:

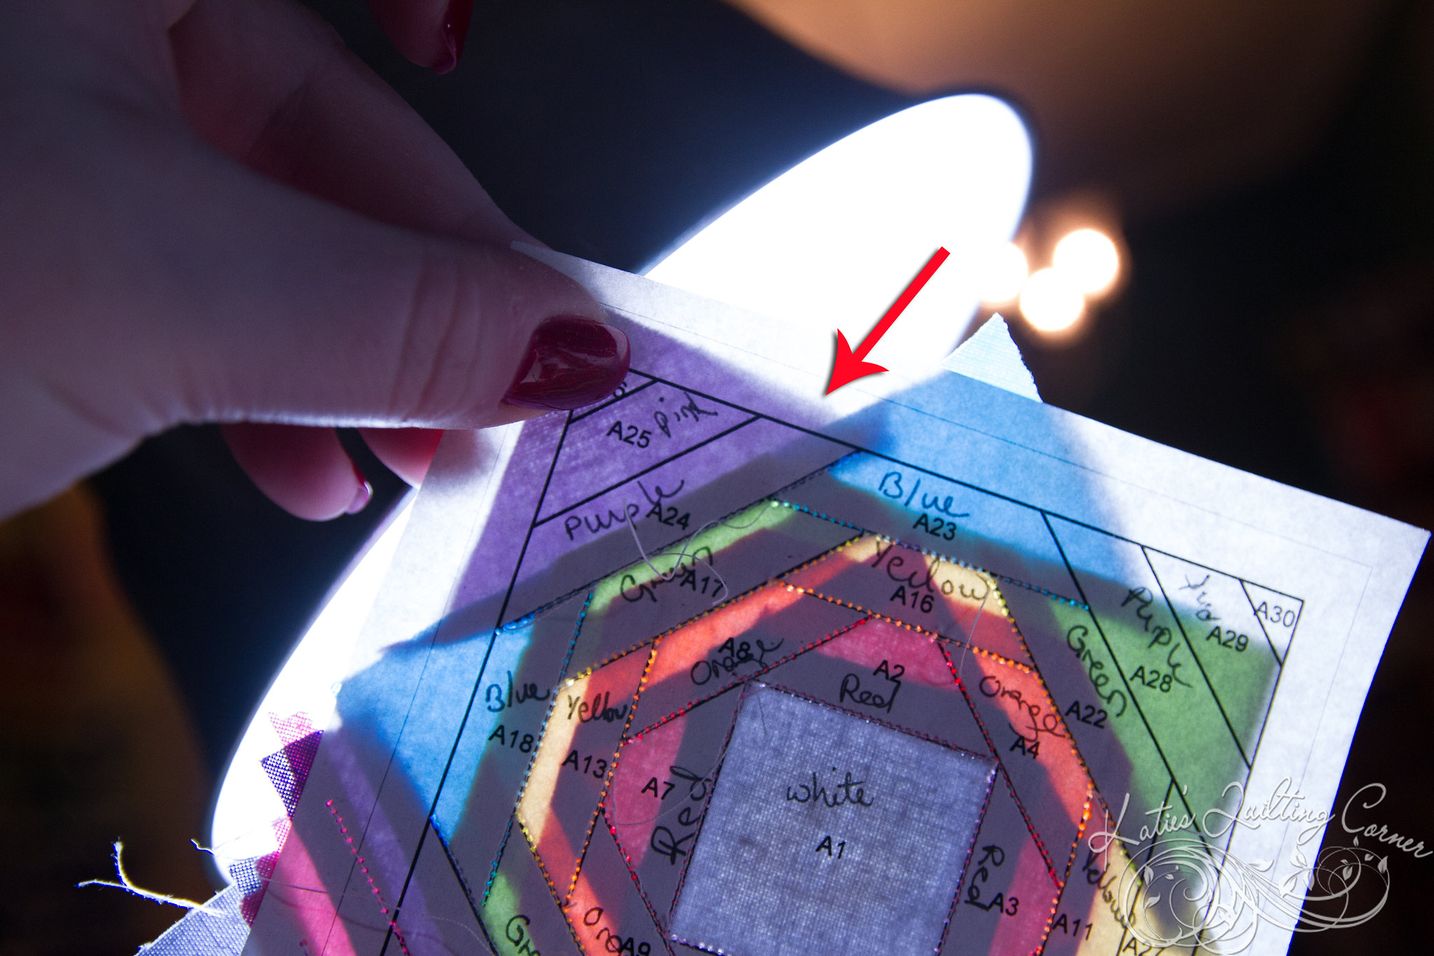
Important: After pressing hold your piece up to the light and make sure it covers the space it’s supposed to AND you have at least 1/4″ around that area. If it does you’re good and ready to move on to A3!

You’re going to follow the same steps over and over until you get to A15. The seam line you should be sewing on is the inside line (the line closer to the middle for that particular space).
Check the size:

Line up the edge of the fabric so it’s overlapping the seam line by at least 1/4″ (I’m adding the A4 piece here so you can faintly make out the seam line inside the A4 space):

Sew your seam line:

Fold the paper back and trim the excess fabric away:

Press:

A7 will finish the first ring of colors outside of your center square. Here I am checking my seam line:


When you get to A15 that is the first space close to the outside seam allowance. You need to make sure your fabric is large enough to cover the space AND go beyond the outside seam allowance. Be sure you doublecheck the size.


A19 is another space that touches the outside edge. You want to make sure it’s long enough to cover both seam allowances. Cut it long! I also start and stop sewing inside the seam allowance.


Here are my pink and gray fabrics for A20 and A21. I’m using big pieces to make sure I get it right!

Once you get those done you’ll have one completed corner.

Troubleshooting: Oops! My piece was too small. What do I do?
That purple piece was too small for that area. After I ironed and checked it I noticed there was a big gap in my seam allowance. Time to pull out the seam ripper!
Remove that piece that’s too small:

This one is plenty big enough!

Finish the rest of your block. Once you get everything sewn it’s time to trim it up. Put your block fabric side down on your cutting mat.

Line up your ruler edges with the outside line of the block (the really faint one) and trim:

It should look like this all trimmed up:

Start on one corner and carefully remove the paper:


Give it another good press. I chose to add outside strips that were 1.5″ to make my pincushion a bit bigger. You can do that or leave it the small size it is now without the border. To add a border cut a strip the length of your pineapple block edge. Right sides together sew a 1/4″ seam along that edge.

Do the same on the opposite side. Press the borders open.


Trim borders even to the block edge. Add the next side. And the opposite side.

Press borders open and trim.

Measure your finished block size and cut a backing fabric that size.

**Optional**: You can cut a square of batting the same size also and quilt your block before making your pincushion.

I quilted my block using just the top block and the batting. I used a 3.0 stitch and 28 wt. Aurifil cotton thread.

Ready to make the pincushion? Time to put your backing fabric on top of your block, right sides together. Line up all the edges. Stitch a 1/4″ seam around the edges starting about 1″ away from one corner and ending about 2″ away from your starting point.


Trim your corners.

Turn it inside out through the opening and use your chopstick or purple thang to gently poke out the corners.

Fold the edges of the opening fabric inside and give it a good press with your iron.

Put your polyfil stuffing in through that opening:

Once you’ve got the amount of stuffing you want in it grab your sewing thread that matches your fabric, hand sewing needle and thimble. Whipstitch or use an invisible ladder stitch to close it.

You should be done now! Stick some pins in and you’re ready to go.


0 comment:
Post a Comment