
Here are five fast, simple and cute mini blocks for you to make this season. You can even turn these into mug rugs, table runners, mini quilts, pillows, placemats, and more!
Let's get started!
*Note: All seams are a scant 1/4”, unless otherwise stated.
Spray starch is strongly recommended, but not required.
Fabrics Used
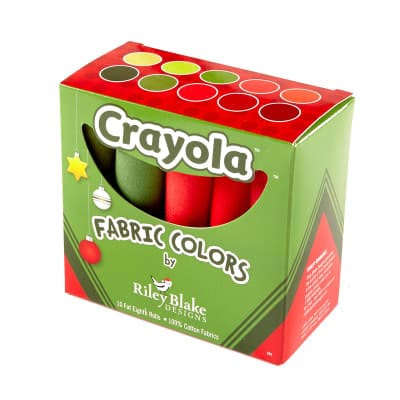
To create these mini blocks, we combined two of our favorite festive pre-cut bundles:The Riley Blake Crayola Fat Eighth Christmas bundle and the Robert Kaufman Artisan Batiks Snowflakes Fat Quarter bundle.

You can use any quilting fabric to create these blocks!
Wreath Mini Block

From Background Fabric, cut:
1- 3.5” square
4- 1.5” squares
From Green Fabric, cut:
4- 1.5” squares
2- 1.5”x5.5”
1- 1.5”x3.5”
2- 1.5” squares
From Red Fabric, cut:
1- 1.5” square
Place the 3.5” background square right side up. Place one 1.5” square of green in each corner; draw a line from corner to corner, as shown, stitch directly on the line.


Trim seams, press green corners out.

Following the picture as a guideline, stitch the rest of the block, pressing seams as you finish (use spray starch to prevent the pieces from stretching out of shape).

Tree Mini Block

From Background Fabric, cut:
2- 1.5”x2.5”
2- 3.5”x7”
From Light Green Fabric, cut:
2- 1.5”x5.5”
From Dark Green Fabric, cut:
2- 1.5”x5.5”
From a Brown Fabric scrap, cut:
1- 1.5” square
Using the photo as a guide, stitch the tree pieces together; pressing seams toward the darker fabric.

Find the middle of the block by folding in half at the top; make a mark at the center and at 1/4” on either side. Measure 1/4” up from the bottom of the block on both sides and make a mark.


With right sides facing, align one 3.5”x7” background piece with the bottom left mark and the center mark; stitch 1/4” away from the raw edge; trim and press background out. (You might find it helpful to draw the seam line first.)

Repeat this process on the other side.

Bulb Mini Block

From Background Fabric, cut:
6- 1.5” squares
2- 1.5”x4.5”
2- 1.5x2.5”
From Light Green Fabric, cut:
1- 3.5” square
1- 1.5” square
1- 1.5”x2.5”
From White Fabric scrap, cut:
1- 3/4” square
From Light Grey Fabric, cut:
2- 3/4”x1.5”
From Dark Grey Fabric, cut:
2- 3/4”x1.5”
Using the photo as a guide, and the previous blocks techniques, assemble block as described:

Place two of the 1.5” background squares, right sides together, on bottom left and right of the 3.5” bulb square; stitch on the line, trim and press.
Place one 1.5” background square on the left side of the 1.5”x2.5” bulb section; stitch on the line, trim and press.
Place the 3/4” square of white (or light grey) on the bottom left 1.5” bulb square; stitch on the line, trim and press. Place the remaining 1.5” background square on this piece, right sides together. Stitch on the line, trim the side that does not have the white corner; press. Sew this section to the bottom bulb section. Stitch the 1.5”x4.5” pieces on each side of the bulb.
Sew the grey pieces together, alternating light and dark, right sides together and pressing after each addition. Attach the 1.5”x2.5” pieces on both sides of this piece. You may need to center it, and trim as necessary. Stitch this section to the top of the bulb; press.
Gift Box Mini Block

From Background Fabric, cut:
5- 1.5” squares
2- 1.5”x2.5”
From Red Fabric, cut:
2- 2.5”x3.5”
From Silver Fabric, cut:
7- 1.5” squares
1- 1.5”x3.5”
Using the photo as a guide, and the previous blocks techniques, assemble block as described.

With right sides together, stitch red fabric to each side of the 1.5”x3.5” silver strip; press.
Draw a line from corner-to-corner on the back of each background square. Place right sides together with three silver squares; stitch, trim and press.

With right sides together, place a background square on top of this piece, making sure the drawn line and the seam are going in the opposite direction (like an X); stitch, trim and press.

Stitch one of these sections on each side of the remaining silver square, making sure that the points are facing out; press. Stitch two remaining background squares on each side; press. Sew to top of gift box section.
Stitch remaining background pieces, right sides together on each side of the last bow piece, making sure the points are facing up; press. Sew to top of gift box section.
Candy Cane Mini Block

From Background Fabric, cut:
3- 1.5” squares
1- 2.5”x3.5”
2- 1.5”x5.5”
Using the photo as a guide, and the previous blocks techniques, assemble block as described.

Draw a line on the back of all but one background square. With right sides together, place these with each red square; stitch on the line, trim and press. Use the photo to lay these pieces out correctly.
With right sides together, place the remaining background square with the line on top of this piece, making sure the drawn line and the seam are going in the opposite direction (like an X); stitch, trim and press.

With right sides together, stitch the piece you just finished to the last background square; press. Stitch this section to the top of the 2.5”x3.5” background piece; press.
With right sides together, stitch the top three pieces of the candy cane together; press. Stitch this section to the top of the background section you just finished.

With right sides together, stitch the candy cane pieces together; press, then stitch to the background section. Attach the 1.5”x5.5” background pieces, right sides together to each side of the candy cane; press.
Happy holiday sewing, everyone!


0 comment:
Post a Comment