
How to Make an Oven Mitt- FREE Sewing Pattern & Tutorial. So, I give you a tutorial: Anthropologie-inspired neon and chambray oven gloves!

Supplies:
1/2 metre of cotton chambray
Fat quarter of Neon Solids in Neon Orange
Neon Orange thread
1 metre of insulating wadding

First, you’re going to want to make a pattern with one of your existing oven gloves. Look how well-loved my Cath Kidston glove is! Make sure to either trace with a half-inch seam allowance or plan to trace the seam allowance onto your fabric.
Download Oven Mitt Pattern

Cut 1 1/2 inch bias strips from your neon fat quarter. You’ll need about a metre to a metre and a half of bias (I’m guesstimating since I made these ages ago and didn’t measure!)

Sandwich your wadding in between your fabric. We’re going to quilt the whole thing and then cut our pieces out afterward. If you want to avoid wasting fabric, use your pattern as a guide to what you’ll need and cut your pieces close to size.

Now grab your ruler and a marking pencil (I used a pink chaco liner pen – love these!) and draw your stitching lines an inch apart on the top fabric.

I was originally going to do a grid, but once I saw how cool the lines looked stitched in just one direction I left it simple. (Design choice not just laziness, obviously!)

Quilt your fabric sandwich.

And use your pattern to cut your pieces out of your quilted fabric – one for each side of each glove (so four pieces if you’re making a set of two.)

Sew two pieces together with the 1/2″ seam allowance.

Snip as close as possible to the stitching line between the thumb and hand.

Finish the raw edges with an overlocker, zig-zag stitch or pinking shears. To avoid bulk in the thumb, either trim away excess seam allowance before finishing or just try to get in close to your seam when you overlock/pink.

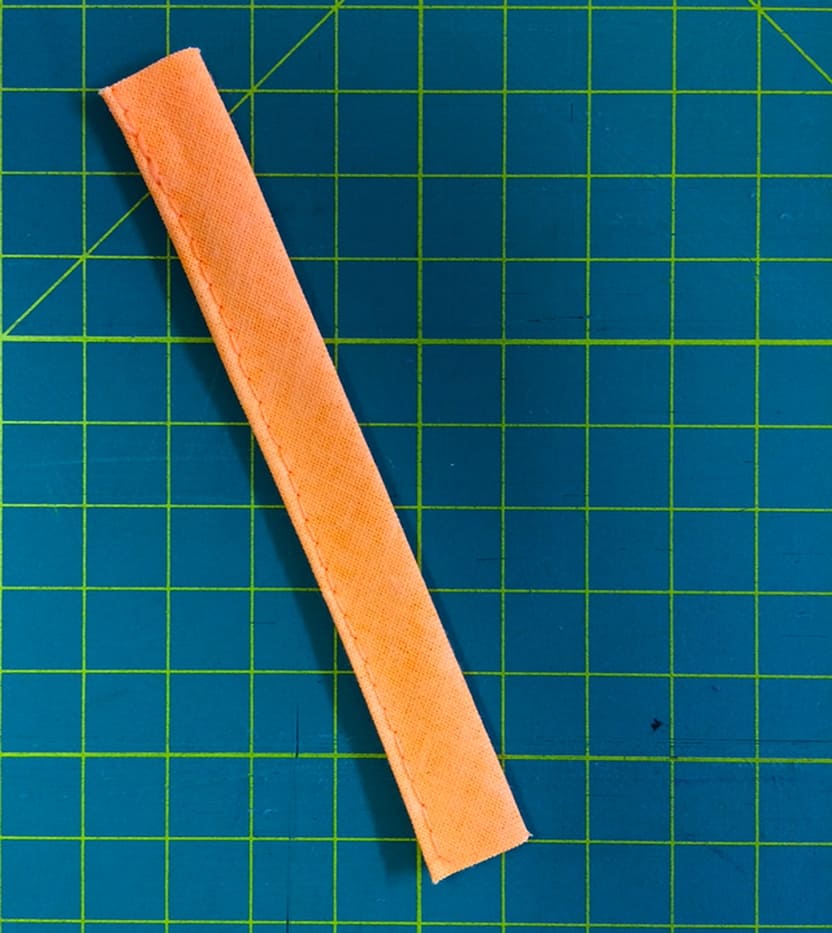
Sew the little bias tape tab that’s going to stick off of your glove by making a three-inch tube and turning it inside out or just pressing the raw edges in and edge stitching it (like me).
Turn your glove inside out, using a point turner to get the fiddly bits if necessary. Enclose the raw edges at the glove’s opening in bias, pin and machine stitch.

Fold the tab and pin the raw edges under the bias wherever you want it on the glove. Machine stitch the bias all the way around (I did a sloppy job on mine as you can see in this picture. Don’t rush!)

And ta da! You have awesome oven gloves to give as a gift or keep for yourself and brighten up your own kitchen!

Aren’t they fun?


0 comment:
Post a Comment