
It's not Your Usual Jane Bag Tutorial


You will need
1 1/4 yd. of Millie's Closet Main Red
1 1/4 yd. of Millie's Closet Dots Blue
1yd of sew-in fleece by Pellon (I used 988)
1-- 3/4” Magnetic Snap Closure
Matching Thread
Washable marker, Loop turner
*Note: I had 1yd of each fabric and I was able to make the bag, but I didn't have much wiggle room when I was cutting. That’s why I added an extra 1/4" on the measurement.
{How to} Please read all the instructions carefully. Seam allowance is 1/2"(included), except some areas. I will point that out in the instructions.
1. Cut fabrics and sew-in fleece.
Cut exterior fabric, according to the measurement in the picture.

Then cut lining

and sew-in fleece

2. Let's prepare the lining. Lay lining on top of the fleece; make sure all the corners and seams line up. Mark 1 1/2" from the top edge in the middle of the fabric (12 1/2" from one edge) where you are going to add magnetic snaps.
3. You can follow the manufacturer’s instructions on the package for the magnetic snaps. One thing I did was to add light weight cardboard to add extra support for the fabrics around the area.

Press firmly on to the fabric to leave a mark

Mark it with washable marker

Cut a slit in the cardboard

The front and back of the fabric


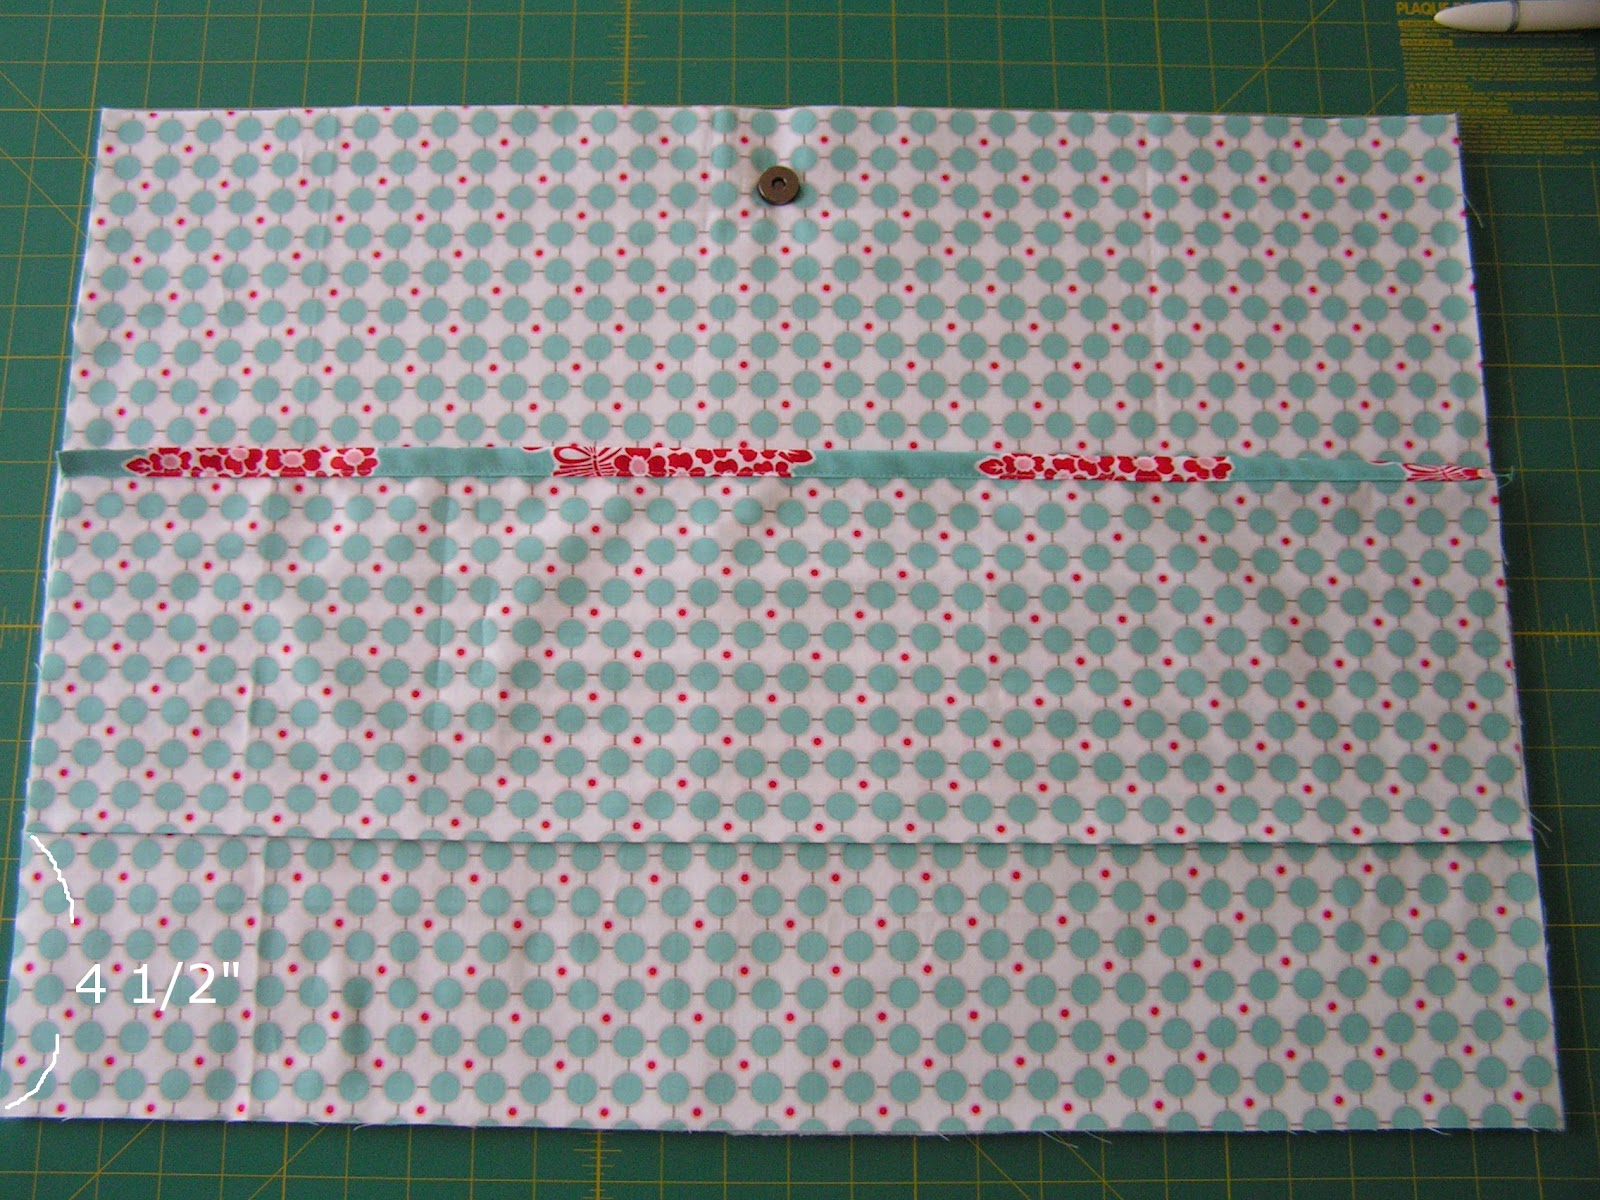
4. Make a couple folded binding tapes (just like bias tape) for the pockets. Take 2" x 25" strips and fold them in half, press them with an iron. Then open them up, and this time, fold both edges toward the middle, press with an iron.
5. Pin the binding tape to one long edge of the pocket, and sew.

6. Fold the other side of the long edge of the pocket with 1/4" seam, and press with the iron.

7. Measure 4 1/2" from the bottom of the main lining fabric, and pin the pockets. Sew the bottom of the pocket with 1/8" seam.
8. Mark the dividing lines on the pockets and sew. This is the part where you can really customize your purse for your needs. Are you going to use the purse as a diaper bag? (then you wanna measure the width of the wipe case etc.) Or take along sewing supply bag? Maybe you wanna throw in some things to take to the beach. I will show you what I did with mine...


9. Put right sides of the fabrics together and pin the edges. Sew the sides and the bottom.

10. Fold the bottom corners to make a boxed bottom. Make sure the seams line up perfectly for a nice finish.

Cut off the excess...

Tada! Now you’ve made a boxed bottom for your purse. :)

11. Make closed-end straps for the handle. Take the 3 1/2" x 22" fabrics and fold 1/4" in the short edges of the fabrics on both sides, press with the iron. Then, fold them in half the long way, open, then fold both edges towards the middle. Insert sew-in fleece as shown in the picture and pin it close. Sew all around it with 1/8" seam.


12. Make strings for the inside. These will allow you to change the size and look of the bag. Fold the 1 1/4" x 15" strip in half the long way right sides together. Sew with 1/4" seam. Cut 1/8" off to make it easier to turn the fabric inside out. Loop turner will be your best friend! Press the strips with the iron.


13. Make the exterior bag in the same manner as steps 8 and 9. Press with the iron. Make sure the seams for the boxed bottom matches perfectly.

14. Assemble the bag. Sew the strings from step 10 to the edge of the side seams of the lining bag. Put together lining bag and the exterior bag right sides together. Again, it is really important that all the seams match up for a pretty finish. Pin all around it. Leaving a 5" opening for turning the fabric inside out later and sewing.


15. Turn the fabric inside out. Match all the seams and corners and press some area with the iron. Press the 5" opening in and pin. Top stitch the opening edge with 1/8" seam.

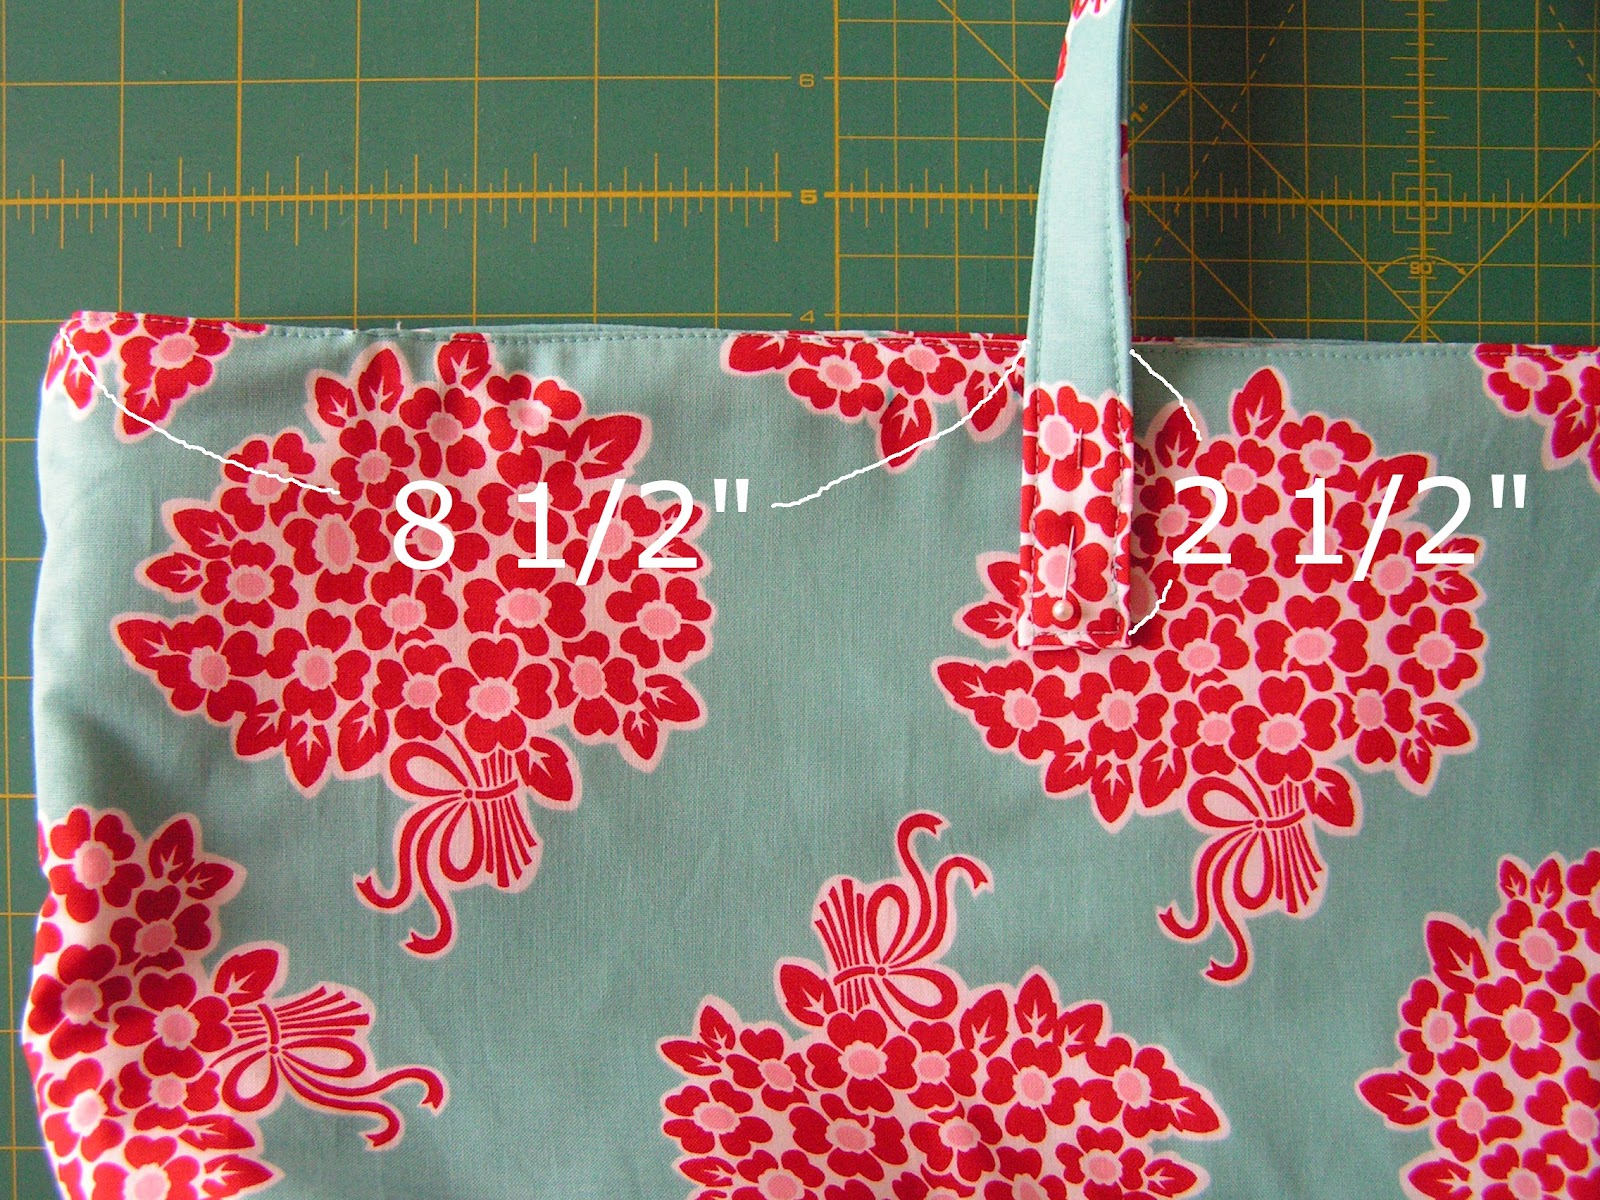
16. Add handles. Use the measurement in the picture as a guide.
17. All you need to do now is to enjoy it!

You might be fooled by her simple structure, but she is not a typical simple Jane...
Check out all the inside pockets for organization and convenience. Mmm... Isn't she attractive?

When you tie the strings inside, you can change the size and look of the purse. I added a brooch. I might even take her to the next girl's night out.
Thank you for let me share my bag tutorial, I hope you enjoyed my post today!


Oh I love this fabric and the FLOWER is divine!!!! So sweet!!!!! Great tutorial!
ReplyDelete